Buttermilk Fried Chicken Recipe tastes ultra crispy on the outside, juicy and tangy inside, with that classic Southern comfort vibe that makes you lick your fingers and not even pretend you’re classy. It uses simple, budget-friendly ingredients that stretch a pack of chicken into a crowd-pleasing dinner in about 45 to 60 minutes of active cooking time. I grew up in a small Midwestern kitchen where Friday night fried chicken meant family, noise, and someone always stealing the crispiest wing before it hit the table.
Reasons To Try This Buttermilk Fried Chicken Recipe
This Buttermilk Fried Chicken Recipe gives you shatteringly crisp crust with juicy, flavorful meat that stays tender even as leftovers. The buttermilk brine seasons the chicken all the way through, so every bite tastes tangy, savory, and perfectly salted, not just the outer layer.
You also save money because you use affordable cuts like drumsticks and thighs, plus basic pantry spices. The recipe works for weeknight dinners, game day spreads, potlucks, or that one friend who claims they “don’t really like fried chicken” and then eats four pieces.
“This Buttermilk Fried Chicken Recipe tastes like a backyard cookout and grandma’s kitchen had a very crunchy baby, and I would happily eat it every weekend. ★★★★★”
Ingredients You Need
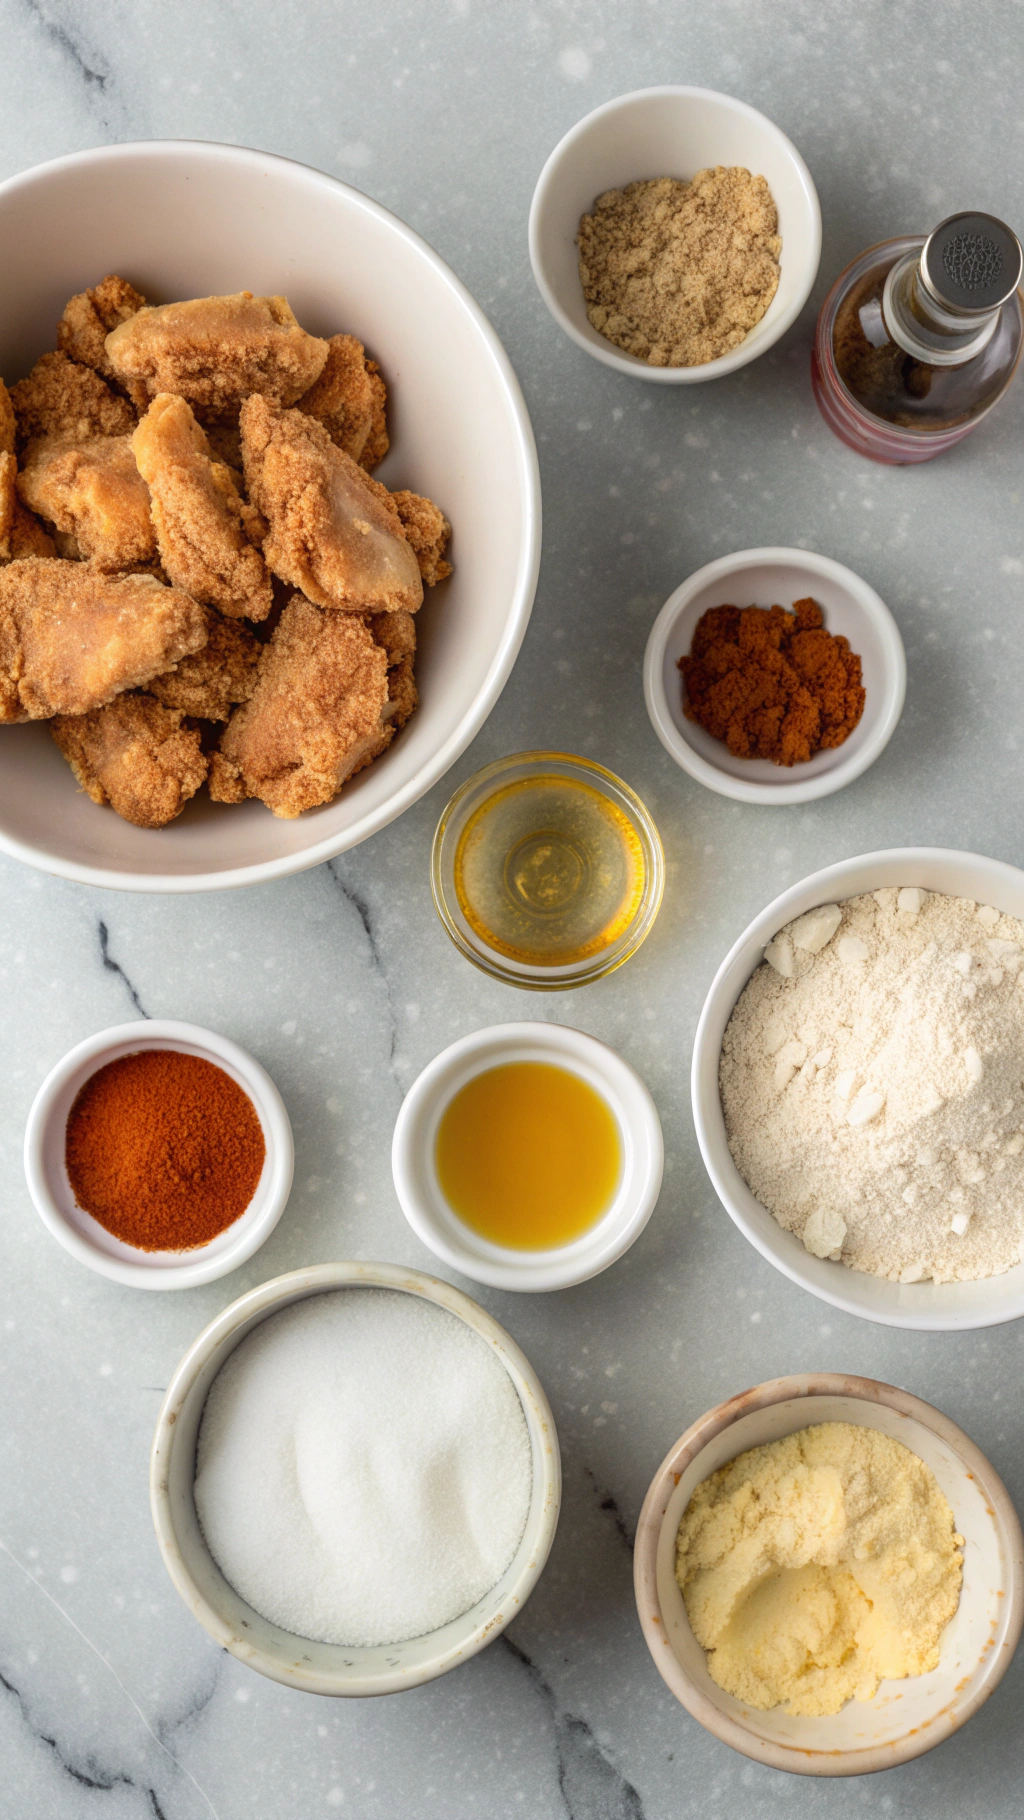
Chicken and Marinade
- 3 to 4 pounds chicken pieces
- 2 cups buttermilk
- 2 large eggs
- 2 teaspoons hot sauce
- Use your favorite brand; I like a vinegar-forward Louisiana style for tang.
- 2 teaspoons kosher salt
- 1 teaspoon black pepper
- 1 teaspoon garlic powder
- 1 teaspoon onion powder
- 1 teaspoon smoked paprika or sweet paprika
Seasoned Flour Coating
- 2 ½ cups all-purpose flour
- ½ cup cornstarch
- This helps the crust fry extra crisp and light.
- 2 teaspoons kosher salt
- 1 ½ teaspoons black pepper
- 2 teaspoons paprika
- 1 teaspoon garlic powder
- 1 teaspoon onion powder
- 1 teaspoon dried thyme or Italian seasoning
- ½ teaspoon cayenne pepper
- Adjust to taste; skip if cooking for kids or spice-sensitive folks.
Oil For Frying
- 6 to 8 cups neutral oil with high smoke point
Pantry Shortcuts and Substitutions
- Use pre-cut chicken party wings if you want smaller, snackable pieces.
- Use seasoned salt instead of plain salt plus herbs if you want a shortcut.
- Use garlic and onion powder instead of fresh garlic and onion to keep prep fast and mess minimal.
- Use gluten-free all-purpose flour blend in place of regular flour if you need gluten-free coating.
Equipment List
- Large mixing bowl or zip-top bag for marinating
- Tongs
- Wire rack set over a sheet pan
- Large heavy pot or Dutch oven for frying
- Instant-read thermometer or clip-on frying thermometer
- Slotted spoon or spider skimmer
- Paper towels
Tips
- Pat chicken dry before marinating so the buttermilk clings better.
- Marinate at least 4 hours, and up to 24 hours, for best flavor and tenderness.
- Bring chicken close to room temperature for 20 to 30 minutes before frying so it cooks evenly.
- Use a thermometer and keep oil around 325 to 350°F for crispy crust and juicy meat.
- Do not crowd the pot; fry in batches so the oil stays hot.
- Let coated chicken rest 10 minutes before frying so the crust sets and sticks.
- Drain fried chicken on a wire rack, not just paper towels, so the bottom stays crisp.
- Season with a light sprinkle of salt right after frying while the crust still feels hot.
How to Make Buttermilk Fried Chicken
1: Marinate the Chicken in Buttermilk
Place the chicken pieces in a large bowl or zip-top bag. In a separate bowl, whisk together buttermilk, eggs, hot sauce, salt, black pepper, garlic powder, onion powder, and paprika. Pour the mixture over the chicken and coat every piece thoroughly.
Cover the bowl or seal the bag and refrigerate at least 4 hours, or up to overnight. Turn the chicken once or twice during marinating if possible so every piece sits in the buttermilk bath.
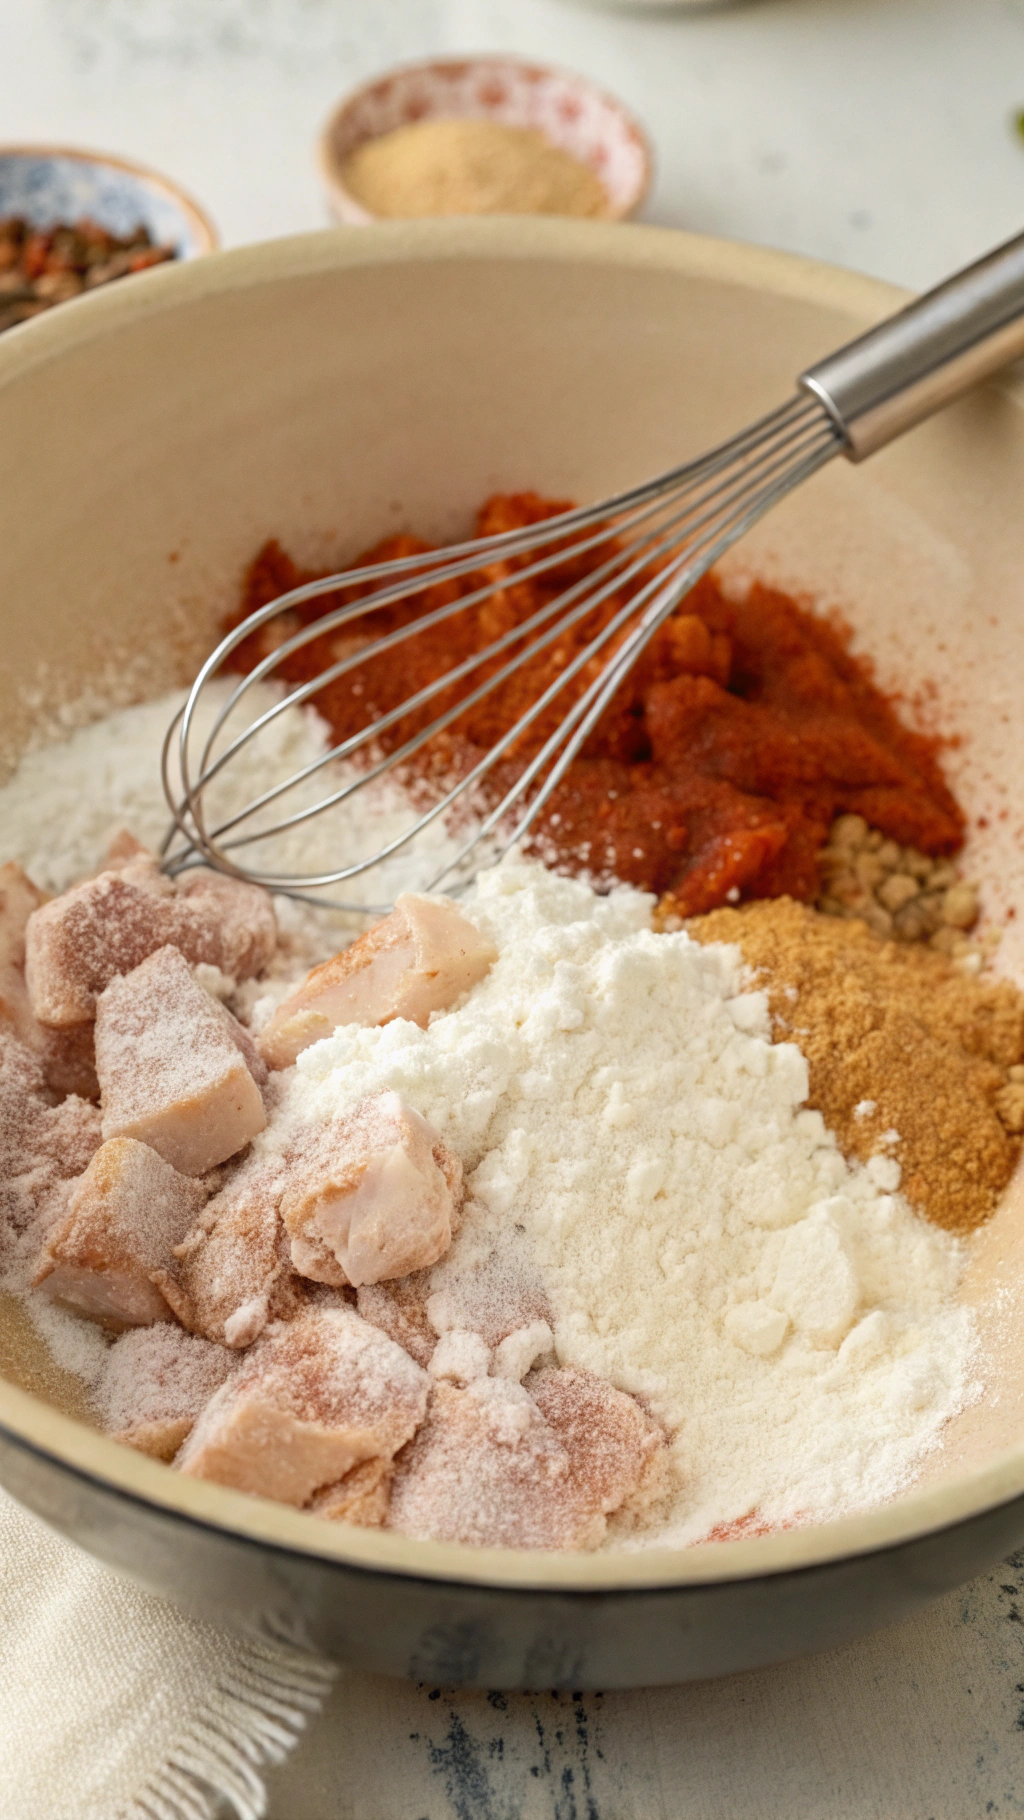
2: Mix the Seasoned Flour
In a large shallow dish, combine flour, cornstarch, salt, black pepper, paprika, garlic powder, onion powder, dried thyme, and cayenne. Stir until the spices distribute evenly through the flour. Taste a pinch of the seasoned flour so you can adjust salt or spice before you coat the chicken.
Keep this dish near the stove so you can move straight from coating to frying. Set a wire rack over a sheet pan next to it for the coated chicken.
3: Coat the Chicken
Remove chicken from the fridge and let it sit 20 to 30 minutes so it loses the chill. Lift one piece at a time from the buttermilk, let excess drip off, then press it into the seasoned flour. Turn and press again so every surface gets a thick, even coating.
Place coated pieces on the wire rack and let them rest 10 to 15 minutes. This short rest helps the flour hydrate slightly and cling, which gives you a crust that stays on the chicken instead of shedding into the oil.
4: Heat the Oil
Pour oil into a large heavy pot or Dutch oven so it reaches about halfway up the sides. Clip on a thermometer and heat the oil over medium to medium-high heat until it reaches 325 to 350°F. Adjust the heat as needed and keep an eye on the temperature.
If the oil smokes, lower the heat and let it cool slightly. Hot but not angry oil gives you golden, crisp chicken instead of burnt crust and raw centers.
5: Fry the Chicken
Carefully lower a few chicken pieces into the hot oil, skin side down if you use skin-on pieces. Do not crowd the pot; leave space between pieces so the oil can circulate. Fry dark meat pieces like thighs and drumsticks about 12 to 15 minutes, turning occasionally, until the crust looks deep golden and the internal temperature reaches 165°F.
Fry smaller pieces like wings and drumettes about 8 to 10 minutes. Adjust the heat to keep the oil near 325 to 350°F as you work through batches.
6: Drain and Rest
Use tongs or a spider skimmer to lift the fried chicken from the oil. Let excess oil drip back into the pot, then place the chicken on a clean wire rack set over a sheet pan. Sprinkle a tiny pinch of salt over the hot crust for extra flavor.
Let the chicken rest 5 to 10 minutes before serving so the juices settle and the crust firms up. Try not to burn your mouth because you “just want a little taste” like I always do.
Different Ways to Try It
- Gluten-free: Use a gluten-free all-purpose flour blend and confirm your hot sauce and seasonings list gluten-free on the label.
- Lower carb: Use a mix of fine almond flour and grated Parmesan instead of regular flour, and skip the cornstarch.
- Extra spicy: Double the cayenne, add chili powder to the flour, and use a spicy hot sauce in the buttermilk.
- Mild version: Skip cayenne and hot sauce, and lean on paprika, garlic, and onion for flavor.
- Herb lover’s version: Add chopped fresh parsley and chives on top right after frying.
- Kid-friendly bites: Use boneless chicken tenders or cut breasts into strips and shorten frying time.
How to Serve Buttermilk Fried Chicken
Serve this Buttermilk Fried Chicken Recipe hot with classic sides like mashed potatoes, coleslaw, and buttery biscuits. Add a crisp green salad or steamed green beans if you want a lighter plate that still feels comforting. Offer dipping sauces like honey, ranch, barbecue, or hot honey for extra fun at the table.
Pack leftovers into lunch boxes with cornbread and fruit, or slice cold chicken over a big salad for an easy next-day meal. This recipe fits family dinners, picnics, game nights, or any time you want that crunchy, nostalgic comfort on a plate.
Make-Ahead and Storage Success
Marinate the chicken up to 24 hours in advance so you only need to coat and fry when dinner time approaches. Store leftover fried chicken in an airtight container in the fridge for up to 3 to 4 days. Reheat in a 375°F oven or air fryer until hot and crisp again; skip the microwave if you want to keep that crust crunchy.
If you want to freeze it, cool the fried chicken completely, then freeze pieces on a sheet pan before transferring them to a freezer bag. Reheat straight from frozen in a hot oven until the center feels hot and the crust crisps back up.

Buttermilk Fried Chicken Recipe
Ingredients
Instructions
- In a large bowl, whisk together the buttermilk, hot sauce (if using), garlic powder, onion powder, paprika, salt, and black pepper.
- Add the chicken pieces to the bowl, turning to coat well in the marinade.
- Cover and refrigerate for at least 4 hours, or overnight for best flavor and tenderness.
- In a shallow dish, combine the flour, paprika, garlic powder, onion powder, salt, black pepper, and cayenne pepper (if using).
- Remove each piece of chicken from the buttermilk, letting excess drip off, then dredge thoroughly in the seasoned flour. Press the flour onto the chicken to help it adhere. Place coated pieces on a tray and let rest 10–15 minutes.
- Pour vegetable oil into a heavy skillet or Dutch oven to a depth of about 1 to 1 1/2 inches. Heat over medium-high heat to 325–350°F (165–175°C).
- Carefully add the coated chicken pieces to the hot oil in batches, avoiding overcrowding the pan.
- Fry, turning occasionally, until the crust is deep golden brown and the internal temperature of the thickest part of the chicken reaches 165°F (74°C), about 12–15 minutes for drumsticks and thighs, slightly less for smaller pieces.
- Transfer fried chicken to a wire rack set over a baking sheet or to a paper towel–lined plate to drain excess oil.
- Let the fried chicken rest for 5 minutes before serving to allow juices to redistribute.
- Serve hot with your favorite sides such as mashed potatoes, coleslaw, or biscuits.
Notes
Approximate per serving (based on 4 servings): 620 calories; fat 38 g; saturated fat 9 g; carbohydrates 30 g; fiber 1 g; sugars 4 g; protein 37 g; sodium 1180 mg. Values will vary based on chicken pieces used, oil absorbed, brands, and portion size.