Oven-Baked Sweet and Sour Chicken Recipe hits that perfect takeout flavor with crispy edges, sticky sauce, and juicy chicken in under an hour, start to finish. It works for busy weeknights, picky eaters, and anyone who wants takeout vibes without deep frying or a huge mess. I tested versions of this for years, and my kids still cheer when they see the sheet pan come out of the oven.
Why Oven-Baked Sweet and Sour Chicken Recipe Is Worth It
You skip the deep fryer but still get crispy, caramelized bites of chicken coated in glossy sweet and sour sauce. The oven does the heavy lifting while you clean up the kitchen or cook rice, so the recipe fits real life, not just weekend cooking projects.
You control the sweetness, the tang, and the veggies, which means better flavor and less mystery than takeout. The recipe also uses simple pantry staples, so you probably own most of what you need already.
“This Oven-Baked Sweet and Sour Chicken Recipe tastes like my favorite takeout, but cleaner, crispier, and way more addictive. ★★★★★”
Ingredients You Need

Chicken
- 2 pounds boneless skinless chicken breast or thighs, cut into 1-inch pieces
- Thighs stay juicier and forgive overcooking a bit more.
- 2 large eggs, lightly beaten
- 1 cup cornstarch
- Use potato starch if you prefer, or arrowroot for a lighter coating.
- 1 teaspoon kosher salt
- 1 teaspoon black pepper
- 2 tablespoons neutral oil (canola, avocado, or grapeseed) for coating the pan and chicken
Sweet and sour sauce
- 1 cup pineapple juice
- Canned 100% juice works great; I usually keep Dole or store brand in the pantry.
- 1/2 cup ketchup
- Heinz or your favorite brand; no need for fancy stuff.
- 1/2 cup rice vinegar
- Use apple cider vinegar if you run out of rice vinegar.
- 1/3 to 1/2 cup light brown sugar, packed
- Start with 1/3 cup if you like a sharper tang, bump to 1/2 cup for a sweeter sauce.
- 3 tablespoons low sodium soy sauce or tamari
- Use tamari or coconut aminos for gluten free needs.
- 2 teaspoons toasted sesame oil
- 2 cloves garlic, minced
- 1 teaspoon grated fresh ginger or 1/2 teaspoon ground ginger
- 1 tablespoon cornstarch mixed with 2 tablespoons cold water
Veggies and add-ins
- 1 red bell pepper, cut into 1-inch chunks
- 1 yellow or orange bell pepper, cut into 1-inch chunks
- 1 small red onion, cut into wedges
- 1 cup pineapple chunks, canned or fresh, drained
- 2 to 3 green onions, thinly sliced, for garnish
- 1 to 2 teaspoons toasted sesame seeds, for garnish
Pantry shortcuts and notes
- Use pre-cut stir fry veggie mixes to save time; just match the size to the chicken pieces.
- Use jarred minced garlic and ginger if you feel tired or rushed; the flavor still works well.
- Buy canned pineapple chunks in juice, not syrup, to keep the sauce from turning too sweet.
Equipment list
- Large rimmed sheet pan or two smaller sheet pans
- Parchment paper or a silicone baking mat
- Medium saucepan for the sauce
- Mixing bowls
- Whisk
- Tongs or a spatula
- Instant read thermometer for best chicken texture
Quick Tips & substitutions
- Cut the chicken into even pieces so everything cooks at the same rate.
- Pat the chicken dry before coating so the cornstarch sticks better.
- Use thighs if you want extra juicy chicken or plan to reheat leftovers.
- Preheat the oven fully so the coating crisps instead of steaming.
- Spread the chicken in a single layer with space between pieces for better browning.
- Stir the sauce while it heats so the cornstarch slurry does not clump.
- Swap rice vinegar with apple cider vinegar if needed; just reduce the sugar slightly.
- Use tamari or coconut aminos and gluten free cornstarch for a gluten free version.
- Skip pineapple chunks if your crew dislikes fruit in savory dishes; add extra bell pepper instead.
- Add a pinch of red pepper flakes if you want a little heat with the sweetness.
How to Make Oven-Baked Sweet and Sour Chicken
1: Prep the chicken and pan
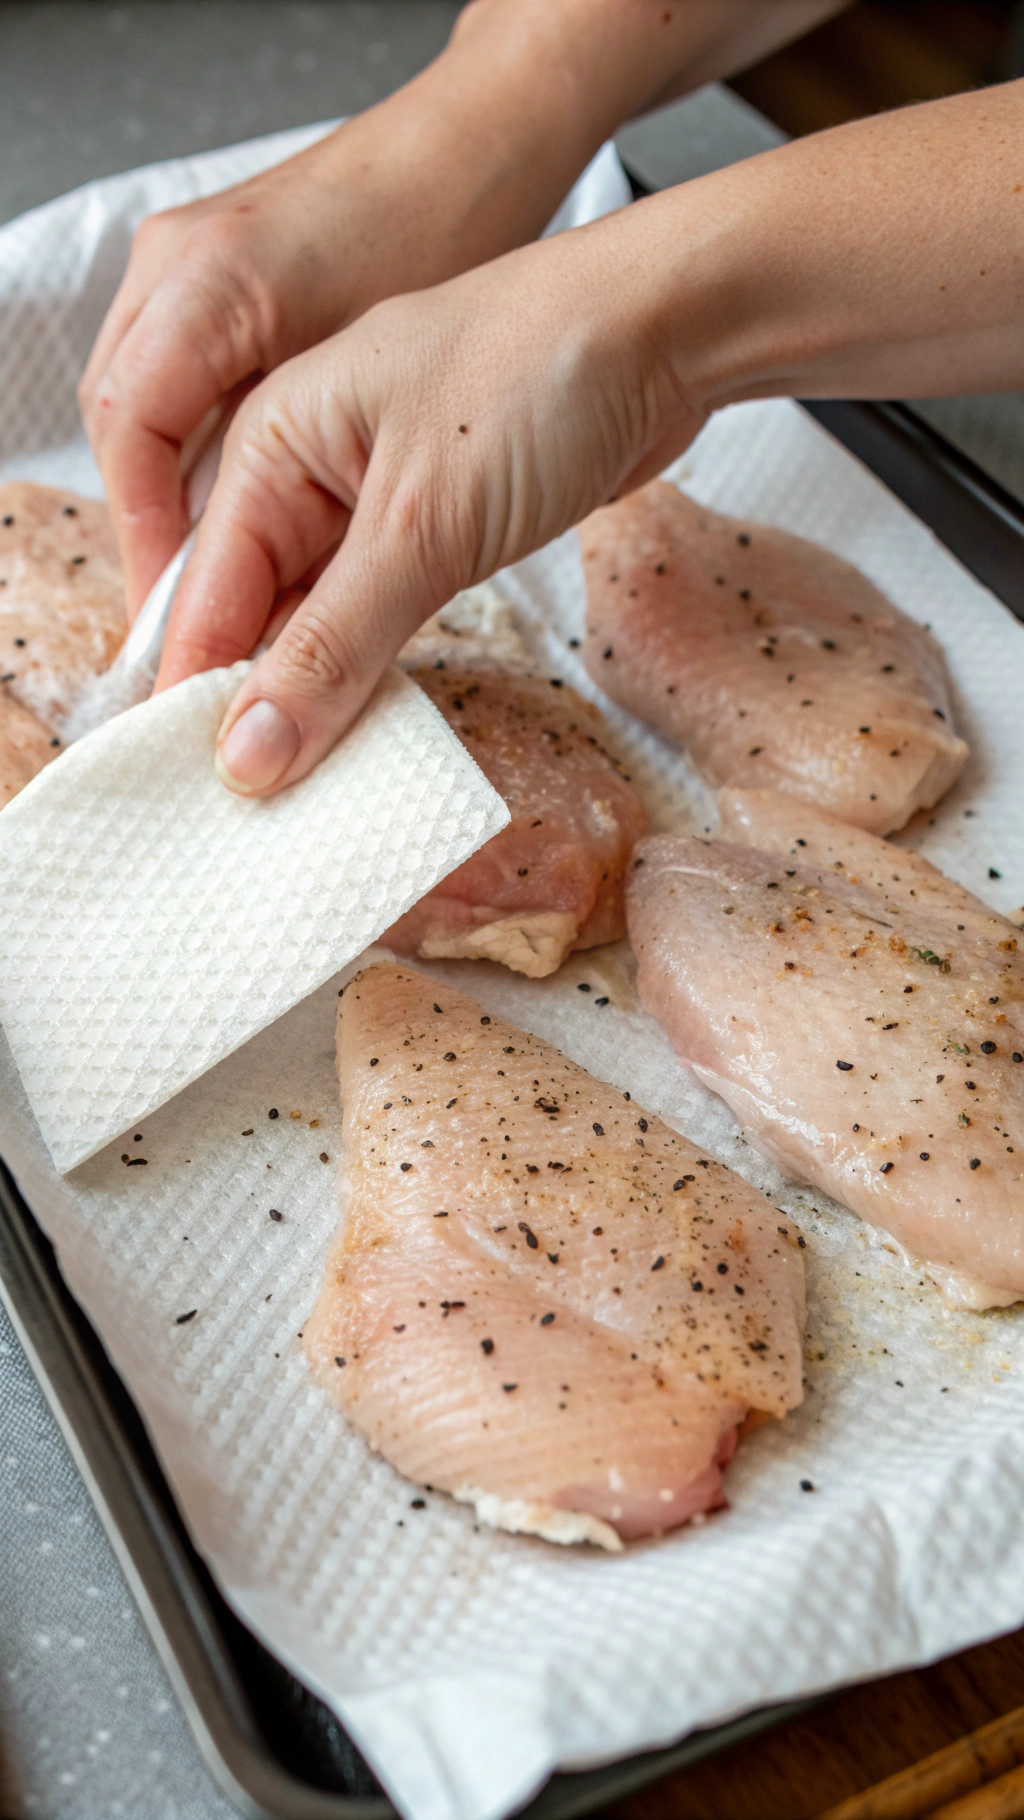
Preheat your oven to 400°F and line a large rimmed sheet pan with parchment. Lightly oil the parchment so the coating does not stick. Pat the chicken pieces dry with paper towels, then season them with salt and pepper.
Place cornstarch in a large bowl and toss the chicken pieces until they look evenly coated. Shake off extra cornstarch so you avoid gummy spots. Dip the coated chicken into the beaten eggs and place the pieces on the prepared sheet pan with a little space between each one.
2: Bake the chicken until crisp
Drizzle or spray a bit of oil over the top of the chicken pieces. Bake for 15 minutes, then flip each piece with tongs. Bake another 8 to 10 minutes, until the chicken feels firm and the coating looks lightly golden and crisp.
Check a few thicker pieces with an instant read thermometer; you want at least 165°F in the center. If you want deeper browning, broil for 2 to 3 minutes, but watch closely so the coating does not burn.
3: Sauté veggies and aromatics
While the chicken bakes, heat a tablespoon of oil in a large skillet over medium high heat. Add the bell peppers and red onion and cook for 4 to 5 minutes, until they soften slightly but still hold some crunch. Stir in the garlic and ginger and cook 1 minute, just until fragrant.
Add the pineapple chunks and toss for another minute so they warm and pick up a little color. Turn off the heat and set the skillet aside while you mix the sauce.
4: Cook the sweet and sour sauce
In a medium saucepan, whisk together pineapple juice, ketchup, rice vinegar, brown sugar, soy sauce, and sesame oil. Bring the mixture to a gentle simmer over medium heat, whisking occasionally. Taste and adjust the sweetness or tang to your preference.
Stir the cornstarch slurry again, then pour it into the simmering sauce while you whisk. Cook 1 to 2 minutes, until the sauce thickens and turns glossy. Turn off the heat; the sauce will thicken a bit more as it cools slightly.
5: Combine chicken, veggies, and sauce
Transfer the baked chicken pieces to the skillet with the veggies. Pour the hot sweet and sour sauce over everything. Toss gently with a spatula or tongs until every piece of chicken looks coated and shiny.
Sprinkle green onions and sesame seeds over the top. Taste one piece and adjust with a tiny splash of soy sauce or vinegar if you want a stronger punch. Serve hot while the coating still feels crisp around the edges.
Recipe Variations
- Gluten free: Use tamari or coconut aminos instead of soy sauce and confirm your cornstarch and ketchup label as gluten free.
- Vegan: Swap chicken with extra firm tofu cubes or cauliflower florets, coat them the same way, and bake until crisp.
- Low carb: Use a low sugar ketchup and a sugar substitute that works for cooking, and serve over cauliflower rice.
- Extra veggie version: Add snap peas, broccoli florets, or zucchini rounds to the skillet with the peppers.
- Spicy version: Add sriracha or red pepper flakes to the sauce for a sweet heat combo.
- Kid friendly tweak: Reduce vinegar slightly and use the lower amount of brown sugar for a softer tang.
Ways to Serve Oven-Baked Sweet and Sour Chicken
- Spoon over steamed jasmine rice or brown rice.
- Serve with veggie fried rice or simple garlic butter noodles.
- Pair with roasted broccoli, green beans, or a crunchy cabbage salad.
- Use as a filling for lettuce cups with extra green onion and sesame seeds.
- Pack leftovers over rice in meal prep containers for easy lunches.
Storage Success
Cool the sweet and sour chicken to room temperature, then store it in airtight containers in the fridge for up to 4 days. Reheat in a skillet over medium heat with a splash of water or pineapple juice so the sauce loosens and the chicken warms evenly. You can freeze portions for up to 2 months, though the coating softens a bit after thawing. I still enjoy the texture after freezing, especially when I reheat it in a hot skillet or air fryer to bring back some of the crisp edges.

Oven-Baked Sweet and Sour Chicken Recipe
Ingredients
Instructions
- Preheat the oven to 400°F (200°C). Line a large baking sheet with parchment paper or lightly grease it.
- Season the chicken pieces with salt and black pepper, then toss with the cornstarch until evenly coated.
- Dip the coated chicken pieces into the beaten eggs, allowing any excess to drip off.
- Heat the vegetable oil in a large skillet over medium-high heat. Sear the chicken pieces in batches for 1–2 minutes per side, just until lightly golden (they do not need to be cooked through). Transfer to the prepared baking sheet in a single layer.
- In a small saucepan, whisk together the sugar, rice vinegar, ketchup, and soy sauce until smooth.
- In a separate small bowl, stir the cornstarch and water together to form a slurry, then whisk it into the sauce mixture along with the minced garlic and ginger.
- Place the saucepan over medium heat and cook, stirring frequently, until the sauce comes to a gentle simmer and thickens enough to coat the back of a spoon, 3–5 minutes. Remove from heat.
- Scatter the chopped red and green bell peppers and pineapple chunks over the partially cooked chicken on the baking sheet.
- Pour the thickened sweet and sour sauce evenly over the chicken and vegetables, gently tossing with a spatula to coat everything well.
- Bake for 18–22 minutes, or until the chicken is cooked through (internal temperature reaches 165°F/74°C) and the vegetables are tender-crisp, stirring once halfway through baking.
- Remove from the oven, sprinkle with sliced green onions, and let rest for a few minutes before serving over hot cooked rice if desired.
Notes
Approximate per serving (1/4 of recipe, without rice): 420 calories; fat 15 g; saturated fat 3 g; carbohydrates 43 g; fiber 2 g; sugars 24 g; protein 27 g; sodium 780 mg. Values will vary based on specific ingredients, brands, and portion size.