Reeses Peanut Butter Cups Recipe tastes like a chocolate shop treat with a thick, salty-sweet peanut butter center and a glossy, snappy chocolate shell. This version uses simple pantry ingredients, stays budget friendly, and works for beginners or seasoned bakers in about 45 minutes total. I tested these on my neighbors, and they now knock on my door like I run a tiny candy factory.
Reasons To Try This Reeses Peanut Butter Cups Recipe
You control the sweetness, the chocolate thickness, and how salty that peanut butter filling tastes. The cups taste richer and fresher than store bought, and the ingredient list stays short and familiar.
You also save serious money when you batch these for holidays, parties, or lunchbox treats. Kids can help with most of the steps, which turns candy night into a fun little kitchen project.
“These homemade Reeses Peanut Butter Cups taste better than the original and disappear twice as fast. ★★★★★”
Ingredients You Need
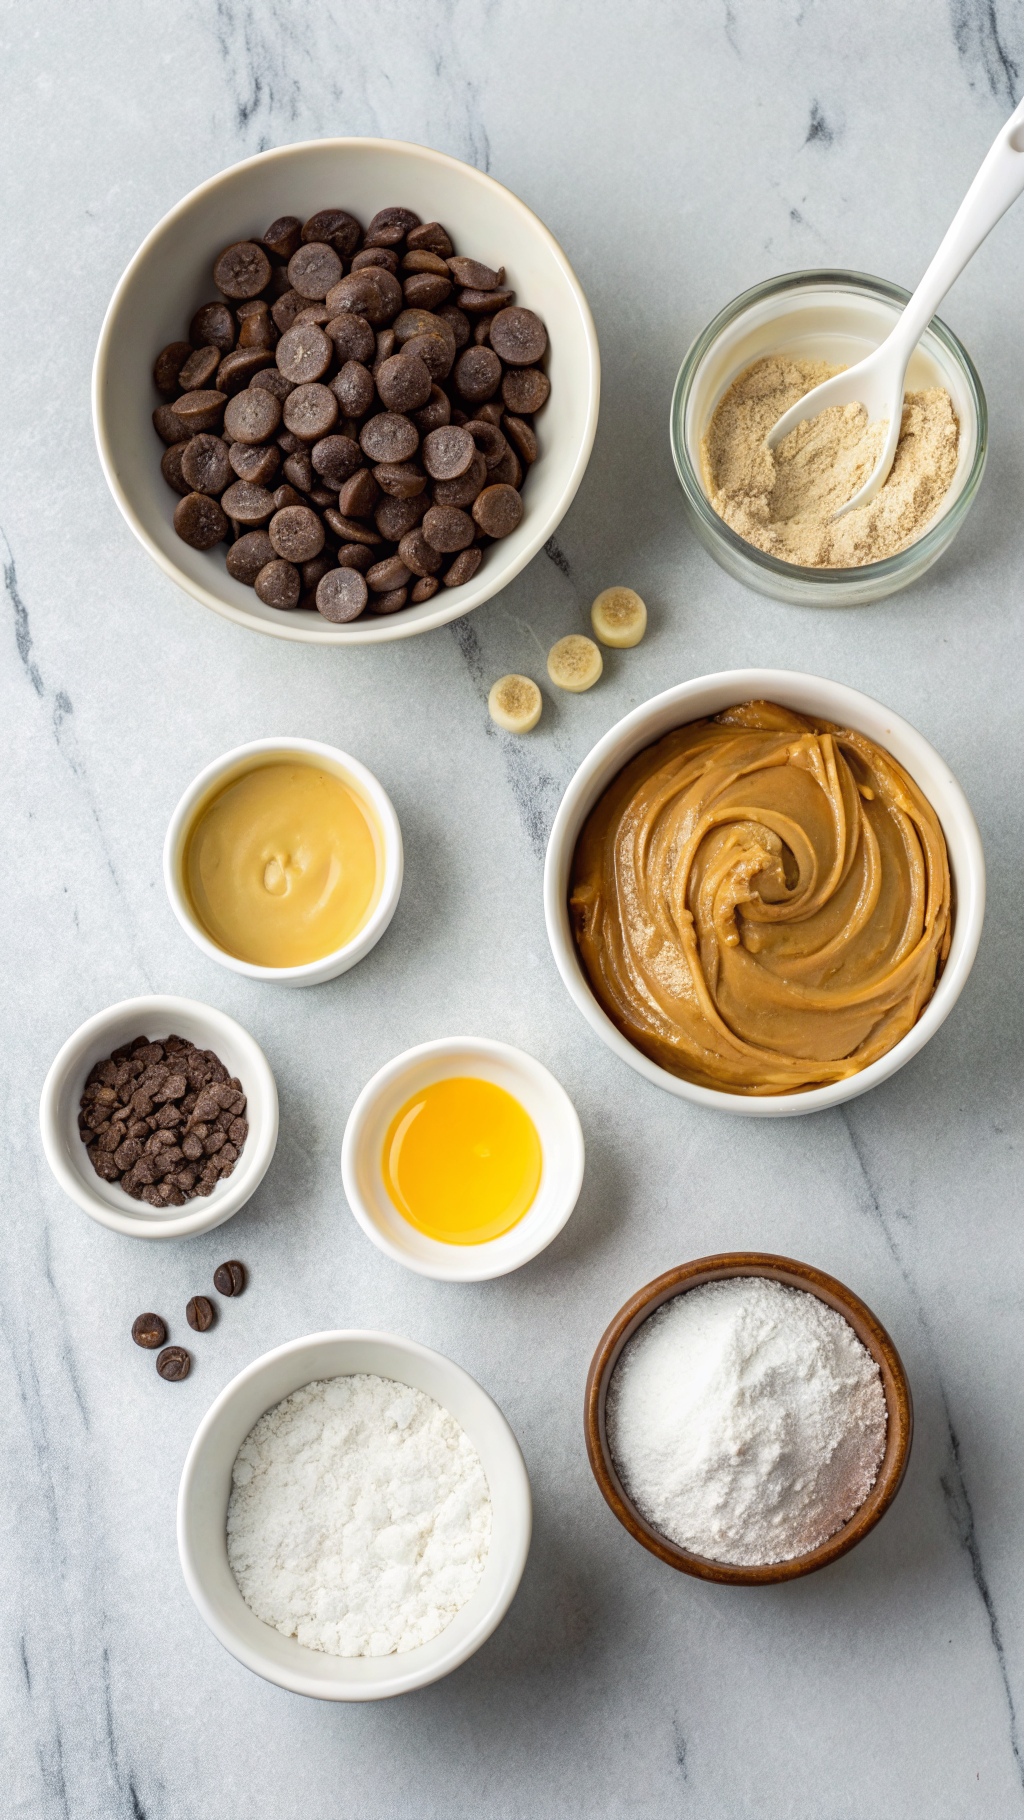
Chocolate layer
- 2 cups semi sweet chocolate chips
- 2 tablespoons refined coconut oil or neutral vegetable oil
- Coconut oil helps the chocolate set with a nice snap.
- Use refined coconut oil if you want no coconut flavor.
Peanut butter filling
- 1 cup creamy peanut butter
- Use shelf stable peanut butter like Jif or Skippy for the best texture.
- Natural peanut butter works, but stir it very well so no oil separation ruins the filling.
- 3 tablespoons unsalted butter, melted
- Salted butter works too; just reduce added salt slightly.
- 1 cup powdered sugar, sifted
- Sifting prevents lumps and gives a smooth, candy shop style filling.
- 1 teaspoon vanilla extract
- 1/4 teaspoon fine sea salt
- Taste and adjust; some peanut butters already contain a lot of salt.
Optional toppings
- Flaky sea salt for sprinkling
- Crushed peanuts
- Mini chocolate chips
- Crushed pretzels for a salty crunch
Pantry shortcuts and substitutions
- Use chocolate melting wafers if you want super shiny cups with less fuss.
- Swap peanut butter with almond butter or sunflower seed butter for peanut allergies.
- Use powdered sweetener like powdered erythritol for a lower sugar version.
Equipment list
- 12 cup muffin tin or 24 cup mini muffin tin
- Paper or silicone cupcake liners
- Microwave safe bowl or heatproof bowl and small saucepan for a double boiler
- Rubber spatula
- Small cookie scoop or teaspoon
- Measuring cups and spoons
- Cooling rack (optional but helpful)
Tips
- Line the muffin tin before you melt chocolate so you move quickly.
- Dry every bowl and utensil completely so no water seizes the chocolate.
- Chill the peanut butter filling briefly if it feels too soft to scoop.
- Tap the muffin tin on the counter to level the chocolate layers.
- Use a small spoon to nudge chocolate up the sides of the liners for full coverage.
- Keep the cups in the fridge if your kitchen runs warm so they stay firm.
- Taste the filling before you chill it and adjust salt or sweetness right away.
- Use mini muffin tins for bite size treats that stretch the batch further.
How to Make Reeses Peanut Butter Cups

1: Prep the pan
Line a standard 12 cup muffin tin with paper liners. If you use a mini muffin tin, line 24 cups. Clear a flat space in your fridge so the tray fits easily.
2: Mix the peanut butter filling
Add peanut butter, melted butter, vanilla, and salt to a medium bowl. Stir until the mixture looks smooth and glossy. Add powdered sugar in two additions and stir until the filling turns thick, soft, and scoopable.
Taste the filling and adjust salt or sugar if you want. If the filling feels sticky or loose, chill it for 10 to 15 minutes so it firms up slightly.
3: Melt the chocolate
Add chocolate chips and coconut oil to a microwave safe bowl. Microwave in 20 to 30 second bursts, stirring after each burst, until the chocolate turns smooth and fluid. If you prefer a double boiler, set the bowl over a small pot of barely simmering water and stir until melted.
Keep the chocolate warm and fluid, but not hot. If it starts to thicken, warm it for another short burst and stir again.
4: Make the bottom chocolate layer
Spoon about 1 to 1.5 teaspoons of melted chocolate into each muffin liner. Tilt or nudge the chocolate so it covers the bottom evenly. Tap the pan gently on the counter to level the chocolate.
Place the pan in the fridge for about 5 to 10 minutes so the chocolate sets slightly. You want a soft set that supports the filling but still bonds with the top layer.

5: Add the peanut butter centers
Scoop about 1 tablespoon of peanut butter filling for standard cups or 1 teaspoon for mini cups. Roll each scoop into a rough ball, then flatten it into a disk slightly smaller than the muffin liner. Place one disk on top of each chocolate base.
Press gently so the filling sits flat and even, but avoid pushing through the chocolate. Leave a small border around the edges so the top chocolate layer can seal the filling.
6: Cover with more chocolate
Spoon more melted chocolate over each peanut butter disk, about 1 to 1.5 teaspoons for mini cups or 2 teaspoons for standard cups. Use the back of the spoon to guide chocolate around the edges so it covers the filling completely. Tap the pan again so the tops smooth out.
If you want toppings like flaky salt or crushed peanuts, sprinkle them on while the chocolate still looks shiny and soft. The toppings will stick as the chocolate sets.
7: Chill and set
Place the filled muffin tin in the fridge for 20 to 30 minutes until the chocolate turns firm. Check one cup by peeling back the liner; the chocolate should hold its shape and not smear. If it still feels soft, chill for another 10 minutes.
Once set, peel off the liners and transfer the cups to an airtight container. Store them chilled or at cool room temperature.
8: Adjust thickness and size next time
If you want a thicker chocolate shell, add a little more chocolate to the base and top layers next round. If you prefer a bigger peanut butter hit, use slightly less chocolate and more filling. Keep notes so you dial in your perfect Reeses Peanut Butter Cups Recipe ratio.
Different Ways to Try It
- Gluten free: Use certified gluten free chocolate chips and toppings; the base recipe already avoids gluten.
- Vegan: Use dairy free chocolate chips, vegan butter, and a plant based peanut butter; skip honey if you use it as a sweetener.
- Low carb: Use sugar free chocolate chips and powdered erythritol or monk fruit instead of powdered sugar.
- Nut free: Swap peanut butter with sunflower seed butter or soy nut butter and check all labels for cross contact.
- Crunchy version: Stir crushed peanuts, rice cereal, or crushed pretzels into the peanut butter filling.
- Extra chocolatey: Add a thin drizzle of melted chocolate over the set cups and sprinkle mini chips on top.
- Holiday twist: Top with colored sprinkles that match the season and tuck them into treat bags.
How to Serve Reeses Peanut Butter Cups
Serve these cups slightly chilled so the chocolate snaps but the peanut butter center feels creamy. Pack them in lunchboxes with fresh fruit and pretzels for a fun treat. Add them to a dessert board with cut fruit, plain cookies, and a bowl of popcorn. Chop a few cups and sprinkle them over vanilla ice cream or swirl them into yogurt for a quick dessert.
Make-Ahead and Storage Success
Make this Reeses Peanut Butter Cups Recipe up to 3 days before you need it and keep the cups in an airtight container. Store them in the fridge if your kitchen runs warm so the chocolate stays firm and glossy. For longer storage, freeze the cups in a single layer, then move them to a freezer bag for up to 2 months. Thaw in the fridge so condensation does not collect on the chocolate surface.

Reese's Peanut Butter Cups Recipe
Ingredients
Instructions
- Line a 12-cup mini muffin tin with paper liners.
- In a microwave-safe bowl, combine chocolate chips and 2 tablespoons of the butter. Microwave in 20–30 second intervals, stirring between each, until smooth and fully melted.
- Spoon about 1 teaspoon of melted chocolate into the bottom of each liner and spread slightly up the sides. Place the muffin tin in the refrigerator or freezer for 5–10 minutes to set.
- In another bowl, combine peanut butter, remaining 2 tablespoons butter (melted), powdered sugar, vanilla extract, and salt. Stir until smooth and thick.
- Divide the peanut butter mixture evenly among the chilled chocolate cups, pressing gently to flatten the tops while leaving a small border around the edges.
- Top each peanut butter portion with another teaspoon or so of melted chocolate, spreading to fully cover the filling and seal the edges.
- Refrigerate for 30–40 minutes, or until completely set. Keep chilled or at cool room temperature until serving.
Notes
Approximate per 1 mini cup (1/12 of recipe): 150 calories; fat 10 g; saturated fat 4 g; carbohydrates 13 g; fiber 1 g; sugars 10 g; protein 3 g; sodium 70 mg. Values will vary based on specific ingredients, brands, and portion size.