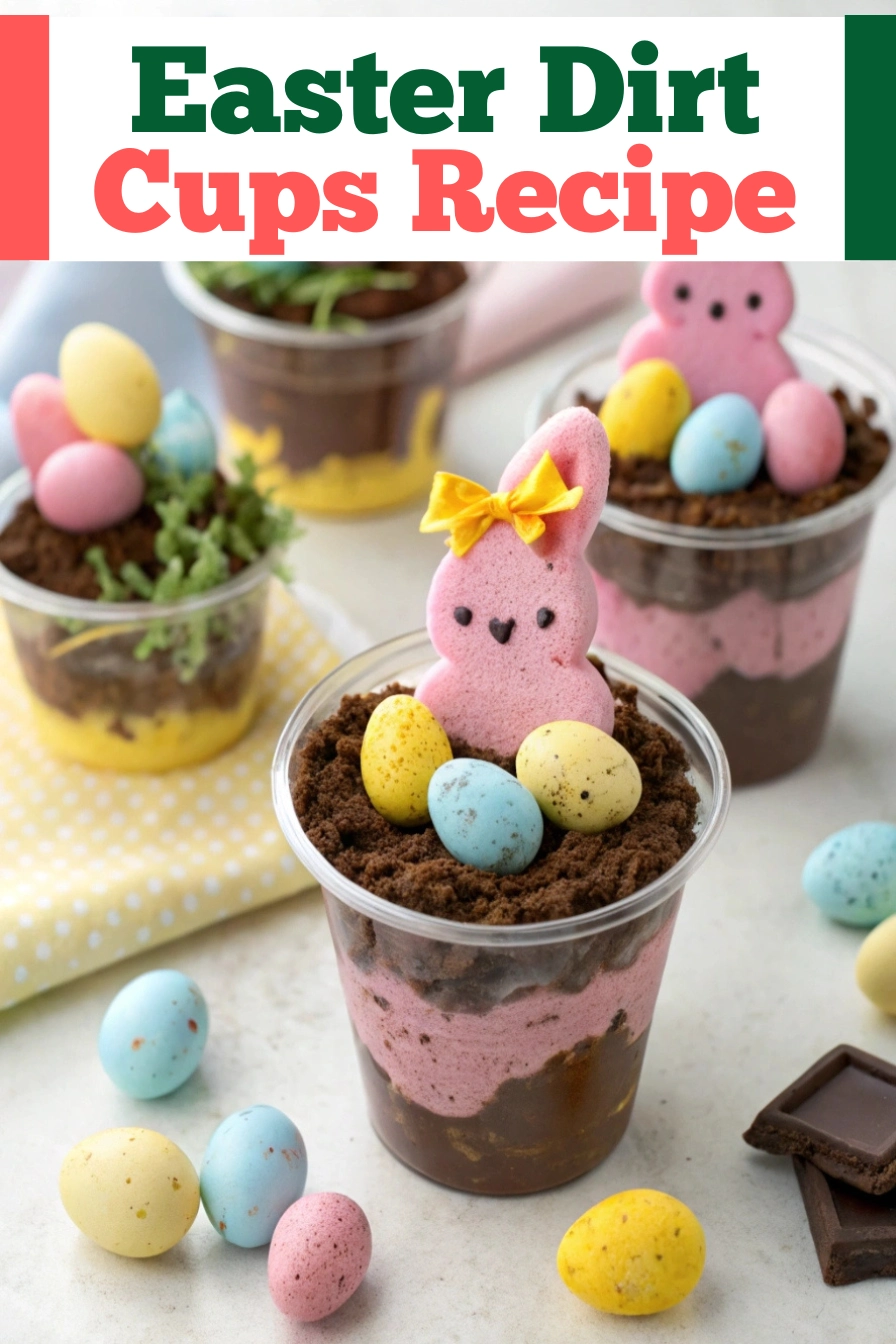
Easter is such a joyous time filled with family, fun, and, of course, delicious treats. One of my favorite recipes to share during this holiday season is the Easter Dirt Cups Recipe. This delightful dessert combines chocolate pudding, whipped cream, and crushed cookies to create a look that mimics dirt. Kids and adults alike love this dessert, especially when topped with gummy worms and sprigs of mint. The best part? It’s incredibly easy to make!
Ingredients for Easter Dirt Cups
Before I get into the fun of assembling these delightful dirt cups, let’s gather all the ingredients. Here’s what you’ll need for about 6-8 servings:
Chocolate Pudding:
- 1 package (3.9 oz) instant chocolate pudding mix
- 2 cups cold milk
- 1 container (8 oz) whipped topping
Oreo Crust:
- 12 Oreo cookies, crushed into fine crumbs
- 2 tablespoons unsweetened cocoa powder
- 2 tablespoons granulated sugar
- 3 tablespoons melted butter
Toppings:
- Gummy worms
- Fresh mint sprigs (for added flair)
- Additional crushed Oreo crumbs (optional)
How to Make the Chocolate Pudding
Making the chocolate pudding is the first step in this recipe. I love using instant pudding because it saves time and tastes great.
- In a medium mixing bowl, add the pudding mix and cold milk.
- Using a whisk, beat the mixture for about 2 minutes until well combined and slightly thickened.
- Once it’s ready, gently fold in the whipped topping until fully mixed. Set aside while you prepare the crust.
Creating the Oreo Crust
The crushed Oreo cookies add that perfect chocolatey crunch to these cups. Here’s how I do it:
- Start by placing the Oreo cookies in a resealable plastic bag. Use a rolling pin or a similar object to crush them into fine crumbs.
- In a medium bowl, combine the crushed Oreos, cocoa powder, sugar, and melted butter. Mix until everything is well combined. The mixture should be crumbly but hold together when pressed.
Assembling the Easter Dirt Cups
Now comes the fun part—putting everything together! I love letting my kids help with this step. It’s a great way to bond and get everyone excited about the dessert.
- Begin by layering the Oreo crust at the bottom of your serving cups. Use about 1-2 tablespoons for the base.
- Next, spoon a layer of the chocolate pudding mix over the crust, filling the cup about halfway.
- Repeat the layers with more Oreo crumbs and another layer of pudding until you reach the top of each cup. Aim for at least two layers of each component for added texture and flavor.
Finishing Touches
Once your cups are filled, it’s time to get creative with the toppings!
- Crush a few more Oreo cookies to sprinkle on top of each cup. This mimics the look of dirt and adds a nice crunch.
- Add a gummy worm or two on each cup, letting them dangle over the edge for that playful dirt look.
- For added color and freshness, place a sprig of mint on each cup as a final touch.
Variations of Easter Dirt Cups
While the original recipe is fantastic, I love experimenting with different flavors and additions. Here are a few variations that I think you might enjoy:
- Vanilla Pudding Cups: Swap the chocolate pudding for vanilla pudding for a lighter flavor.
- Fruit Additions: Layer fresh strawberries or raspberries between the layers for a fruity twist.
- Different Cookies: Try using graham crackers or chocolate wafer cookies for a change in taste and texture.
Tips for the Best Dirt Cups
Over the years of making Easter Dirt Cups, I’ve learned a few tips for making them even better:
- Chill Time: For the best experience, allow the cups to chill in the refrigerator for at least 30 minutes before serving. This helps the flavors meld.
- Portion Control: Use smaller cups for serving. It makes everyone feel like they can enjoy their dessert without overindulging.
- Personal Touch: Encourage kids to personalize their dirt cups with extra toppings or their favorite candies to make it their own.
Making Dirt Cups Ahead of Time
One of my favorite things about this dessert is that it can be made ahead of time. Here’s how I handle it:
- Assemble the cups and cover them with plastic wrap. They can be stored in the fridge for up to 2 days before serving.
- If you decide to add gummy worms, wait until the day of serving to prevent them from getting too soggy.
Serving Suggestions for Easter Gatherings
Easter is all about gatherings and celebrations. I love to serve these dirt cups alongside other festive treats. Here are some ideas:
- Easter Basket Cupcakes: Brightly colored cupcakes that look like little Easter baskets.
- Fruit Salad: A fresh fruit salad with seasonal fruits brings a vibrant touch.
- Chocolate Bunnies: No Easter is complete without the classic chocolate bunnies; they make great table decorations too.
Fun Facts About Dirt Cups
Just for some fun during your Easter celebration, did you know that dirt cups have been a favorite since the 1980s? These treats are a nostalgic part of childhood for many!
It’s great to see kids today still loving them. They are a fun way to celebrate spring and enjoy a sweet treat while exploring creativity in the kitchen.
Storing Leftovers
If you have any leftovers, here’s how I recommend storing them:
- In an Airtight Container: Transfer any uneaten dirt cups into a sealed container and store them in the refrigerator. They usually last for about 2 days.
- Avoid Freezing: I don’t recommend freezing them, as the whipped topping and pudding may change texture upon thawing.
Enjoying Your Easter Dirt Cups Recipe
The Easter Dirt Cups Recipe is a delightful treat that brings joy to any gathering. I love how simple it is to make and how enjoyable it is to eat.
Whether you are hosting a large family gathering or just enjoying a quiet Easter at home, these cups will surely please everyone. The memories of creating and enjoying them together are what make them truly special.