Homemade Violet Flower Jelly Recipe has become one of my favorite things to make in the spring. The delicate flavor of violets combined with the sweetness of sugar creates a unique treat that’s perfect for spreading on toast or adding to desserts. I remember the first time I made this jelly; it was a sunny afternoon, and I had just picked a basket full of vibrant violet flowers from my garden. The whole experience felt magical, and the end result was simply delightful.
What Are Violet Flowers?
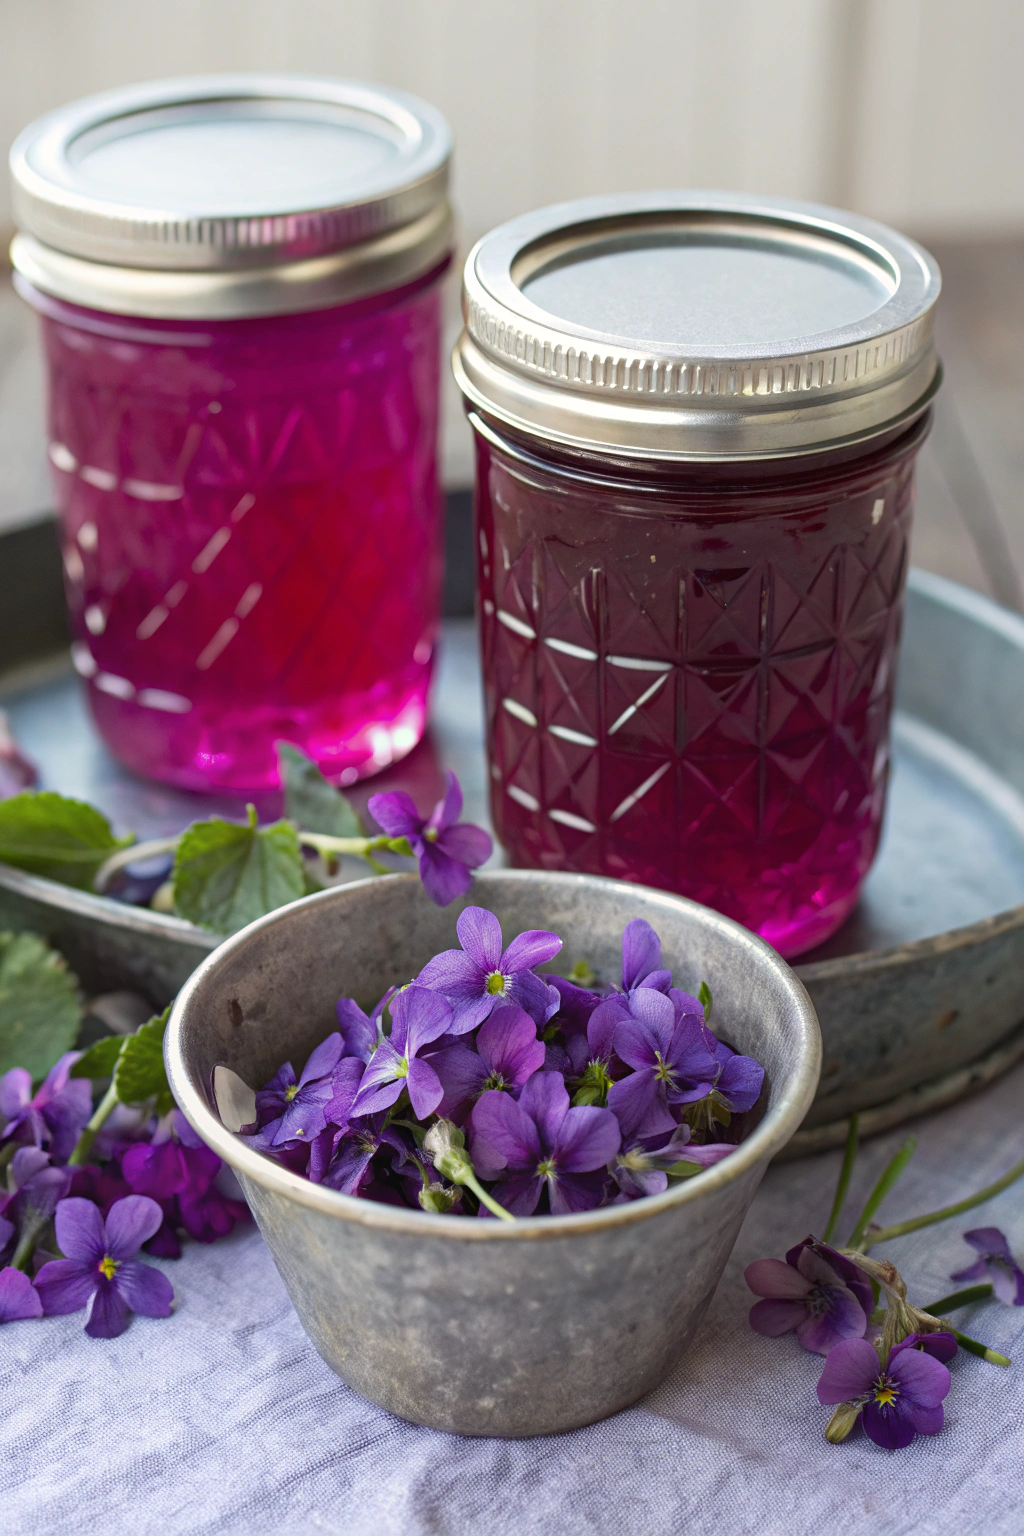
Violet flowers are small, beautiful blooms that often grow in gardens and wild areas. They come in various shades of purple, blue, and white. Not only are they lovely to look at, but they also have a sweet, floral taste that makes them perfect for culinary uses. I love walking through my garden and seeing these little gems pop up every spring.
Why Make Violet Flower Jelly?
Making violet flower jelly is an enjoyable way to preserve the essence of spring. The jelly has a lovely color and a subtle floral taste that adds a unique twist to your breakfast or dessert. Plus, it’s a fun project to do with family or friends. I often invite my kids to help me pick flowers and stir the pot. It turns into a fun family activity, and it’s a great way to introduce them to the joys of cooking.
Ingredients for Homemade Violet Flower Jelly Recipe
To make this delightful jelly, you will need the following ingredients:
- 2 cups violet flowers (freshly picked)
- 2 cups water
- 1/4 cup lemon juice (freshly squeezed)
- 1 package (1.75 oz) fruit pectin
- 3 cups granulated sugar
How to Prepare Violet Flower Jelly Recipe
Before you start making the jelly, it’s essential to prepare the violet flowers properly. Here’s how I do it:
- Pick the Flowers: Choose fresh, fully opened violet flowers. Avoid any with brown spots or wilting petals. I usually pick them in the morning after the dew has dried.
- Wash the Flowers: Rinse the flowers gently under cool water to remove any dirt or insects. I like to spread them on a clean towel to dry.
- Remove the Green Parts: Carefully remove the green calyx from the flowers. This step is important as it can make the jelly bitter if left in.
Making the Violet Flower Jelly
Now that the flowers are ready, let’s move on to making the jelly. Here’s a step-by-step guide:
Step 1: Make the Violet Infusion
In a medium saucepan, combine the violet flowers and water. Bring it to a boil, then reduce the heat and let it simmer for about 15 minutes. I love watching the water turn a beautiful purple hue during this process. Once done, strain the mixture through a fine mesh sieve or cheesecloth into a bowl, pressing the flowers to extract as much liquid as possible.
Step 2: Combine Ingredients
In a clean saucepan, combine the violet infusion, lemon juice, and fruit pectin. Stir well and bring it to a rolling boil. This is the moment when the sweet aroma fills the kitchen, and I can hardly wait to taste the jelly.
Step 3: Add Sugar
Once the mixture is boiling, add the granulated sugar all at once. Stir constantly until the sugar is completely dissolved. Continue boiling for about 1-2 minutes, or until the mixture reaches a full rolling boil. This is where the magic happens, and I can feel the excitement building as the jelly starts to thicken.
Step 4: Test for Doneness
To check if the jelly is ready, I like to perform a simple test. I take a spoonful of the mixture and let it cool for a minute. If it holds its shape and wrinkles when pushed with my finger, it’s ready to be poured into jars.
Step 5: Jar the Jelly
Carefully pour the hot jelly into sterilized jars, leaving about 1/4 inch of headspace. Wipe the rims of the jars with a clean cloth to remove any residue. Place the lids on the jars and seal them tightly. I always feel a sense of accomplishment when I see those jars filled with vibrant jelly.
Canning and Storing Your Jelly
After jarring the jelly, it’s essential to process the jars to ensure they are sealed correctly. Here’s how I do this:
- Water Bath Canning: Place the jars in a boiling water bath for about 5-10 minutes. This step helps to kill any bacteria and seals the jars properly.
- Cooling: Remove the jars from the water bath and let them cool on a clean towel or cooling rack. You’ll hear the satisfying “pop” sound as the lids seal.
- Storage: Once cooled, store the jars in a cool, dark place. I usually keep mine in the pantry, and they can last for up to a year if sealed properly.
Ways to Use Violet Flower Jelly
Now that you have your homemade violet flower jelly, you might wonder how to use it. Here are some of my favorite ideas:
- Spread on Toast: It’s perfect for breakfast on warm toast or a bagel.
- Pair with Cheese: The floral notes complement soft cheeses beautifully.
- Use in Desserts: Drizzle it over cakes or ice cream for a sweet touch.
- Mix into Drinks: Stir it into lemonade or cocktails for a unique twist.
Tips for Making the Best Violet Flower Jelly Recipe
Here are some tips I’ve learned over the years to ensure your jelly turns out perfectly:
- Choose the Right Flowers: Always pick fresh, chemical-free flowers. This makes a significant difference in flavor.
- Don’t Rush the Process: Take your time when making the infusion and boiling the jelly. Patience pays off in flavor.
- Experiment with Flavors: Try adding other herbs or fruits to your jelly for a unique flavor profile. I love adding a hint of mint or lemon zest.
Common Mistakes to Avoid
While making violet flower jelly is relatively simple, there are a few common mistakes to avoid:
- Using Old Flowers: Old or wilted flowers can lead to a less flavorful jelly.
- Not Straining Properly: Failing to strain the infusion well can result in a gritty texture.
- Skipping the Lemon Juice: This ingredient helps balance the sweetness and is essential for proper jelling.
The Joy of Homemade Violet Flower Jelly Recipe
Making homemade violet flower jelly is not just about the end product; it’s about the experience. From picking the flowers to watching the jelly set, each step is filled with joy. I love sharing this jelly with friends and family, and I often gift jars during the spring season. It’s a lovely way to share a taste of my garden and the beauty of nature.