Classic Lemon Bars Recipe hits that perfect balance of bright, tangy lemon and buttery shortbread with a soft, custardy center and a light dusting of powdered sugar. It works for anyone who wants a bakery-style dessert in about 1 hour total, including baking and cooling time in the fridge. I have baked these for everything from PTA meetings to solo Tuesday nights, so you are in good company here.
Why Make This Classic Lemon Bars Recipe at Home
Homemade lemon bars taste fresher, brighter, and more buttery than anything from a box mix. You control the tartness, the sweetness, and the thickness of both the crust and the filling.
You also skip weird additives and use real lemons, which gives the bars that clean citrus flavor. Plus, your kitchen smells like a sunshine factory, which might be my favorite part.
“These classic lemon bars taste like a bakery treat, but they come together so easily at home that I make them for every family gathering. ★★★★★”
Ingredients You Need
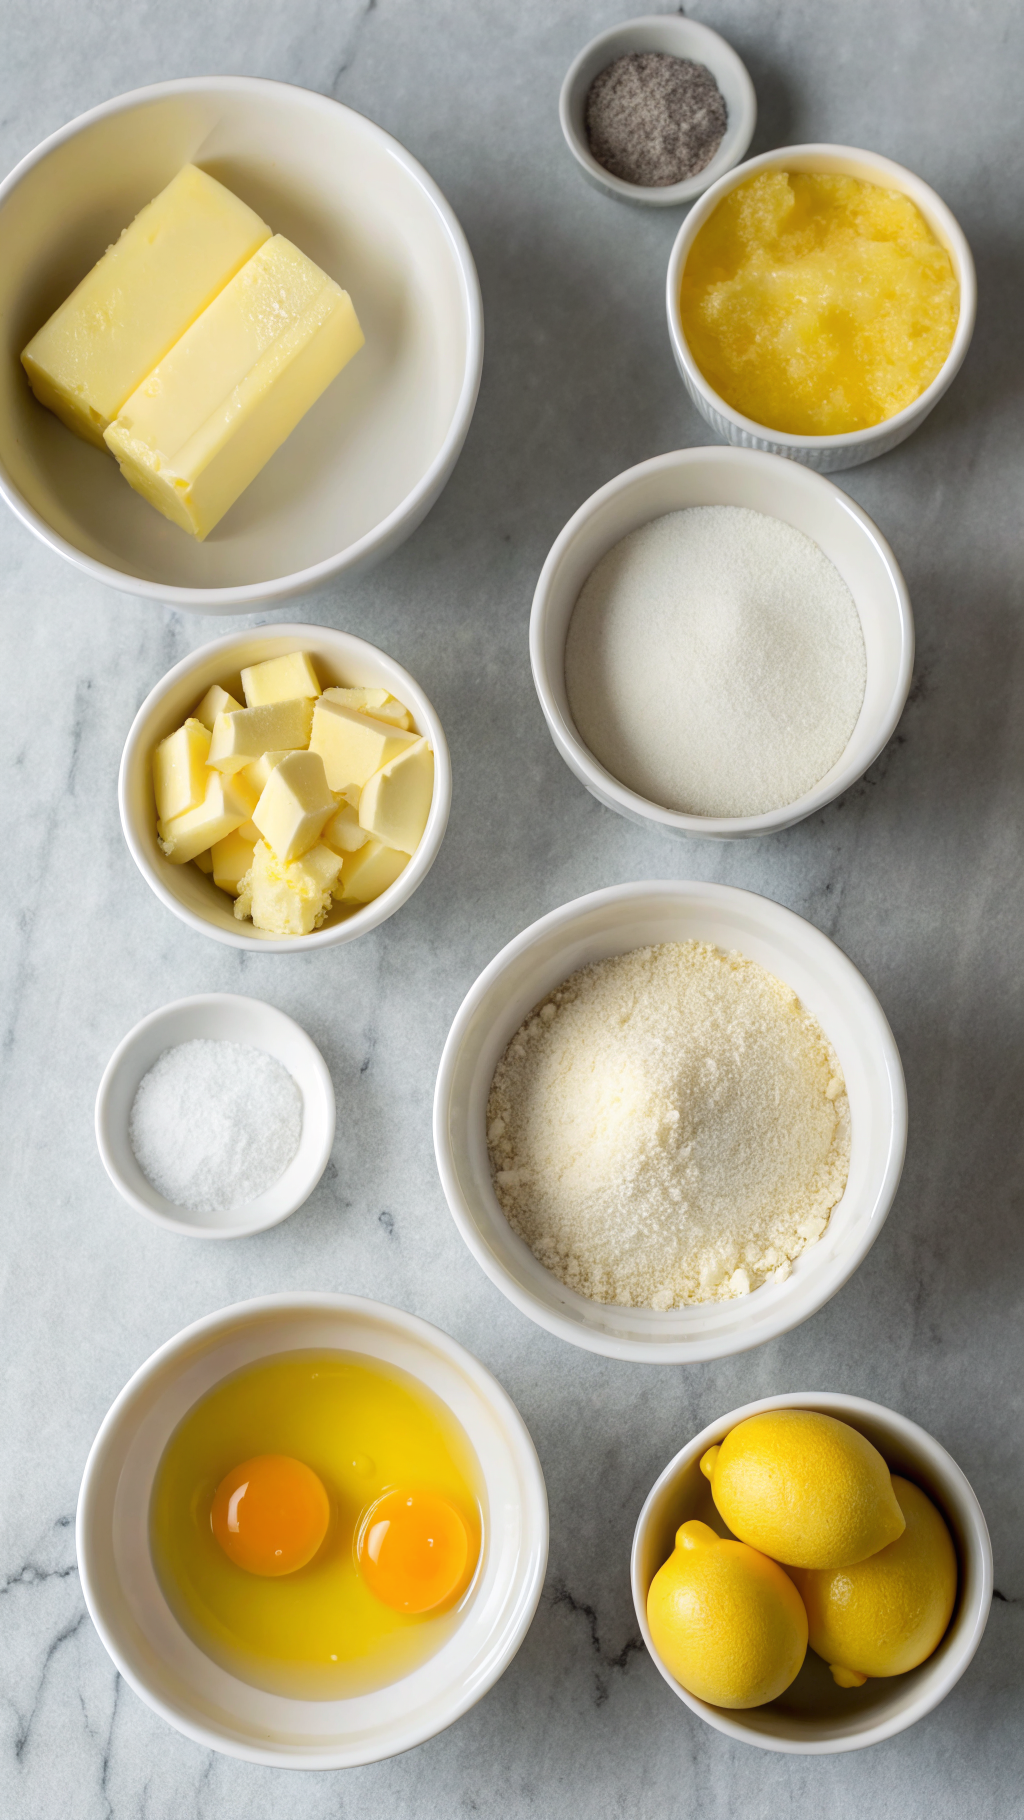
The shortbread crust
- 1 cup (2 sticks / 226 g) unsalted butter, softened
- I prefer a good-quality American butter; salted butter works if you reduce the added salt slightly.
- 1/2 cup (100 g) granulated sugar
- 2 cups (240 g) all-purpose flour
- Use regular unbleached flour; store brands usually work fine.
- 1/4 teaspoon fine sea salt
The lemon filling
- 4 large eggs, room temperature
- 1 1/2 cups (300 g) granulated sugar
- 1/4 cup (30 g) all-purpose flour
- 2/3 cup (160 ml) fresh lemon juice
- Usually 3 to 4 medium lemons; I use fresh juice for the best flavor, not bottled.
- 1 tablespoon finely grated lemon zest
- Meyer lemons give a slightly sweeter, floral note if you want a softer citrus flavor.
- Pinch of salt
Topping
- Powdered sugar, for dusting
Pantry shortcuts and substitutions
- Use pre-squeezed refrigerated lemon juice only in a pinch; taste it first and add extra zest to boost flavor.
- Swap half the lemon juice with fresh lime juice for a lemon-lime twist.
- Use gluten-free 1:1 baking flour for both crust and filling if you need a gluten-free version; choose a blend that includes xanthan gum.
Equipment list
- 9 x 13 inch baking pan (metal pan browns the crust more evenly than glass)
- Parchment paper or foil, for lining
- Mixing bowls
- Hand mixer or stand mixer (you can mix by hand, but a mixer makes it easier)
- Whisk
- Measuring cups and spoons
- Fine grater or microplane for zest
- Fine mesh sieve (optional, for extra smooth filling)
- Cooling rack
- Sharp knife for cutting bars
Tips & Mistakes
- Line the pan with parchment and leave overhang so you lift the whole slab out easily and cut clean bars.
- Soften the butter, but do not melt it, or the crust turns greasy and tough.
- Press the crust evenly into the pan; thin spots bake too quickly and turn hard.
- Chill the crust in the fridge for 10 to 15 minutes before baking if your kitchen runs warm.
- Use fresh lemons for this Classic Lemon Bars Recipe; bottled juice often tastes dull or slightly bitter.
- Whisk the filling just until smooth; do not overbeat or you add too much air and create bubbles on top.
- Strain the lemon filling through a fine sieve if you see egg bits or want a super silky texture.
- Pour the filling over the crust while the crust still feels warm; this helps the layers bond.
- Bake until the center looks set and only jiggles slightly; if it sloshes, it needs more time.
- Cool the bars fully, then chill them before cutting; warm bars collapse and smear.
- Dust with powdered sugar right before serving; if you dust too early, the sugar melts into the surface.
- Use a sharp knife and wipe the blade between cuts for those bakery-style clean edges.
How to Make Classic Lemon Bars
1: Prep the pan and oven
Preheat your oven to 350°F (175°C). Line a 9 x 13 inch pan with parchment paper, leaving a little overhang on the long sides so you lift the bars out later. Lightly grease the parchment and sides of the pan with butter or nonstick spray.
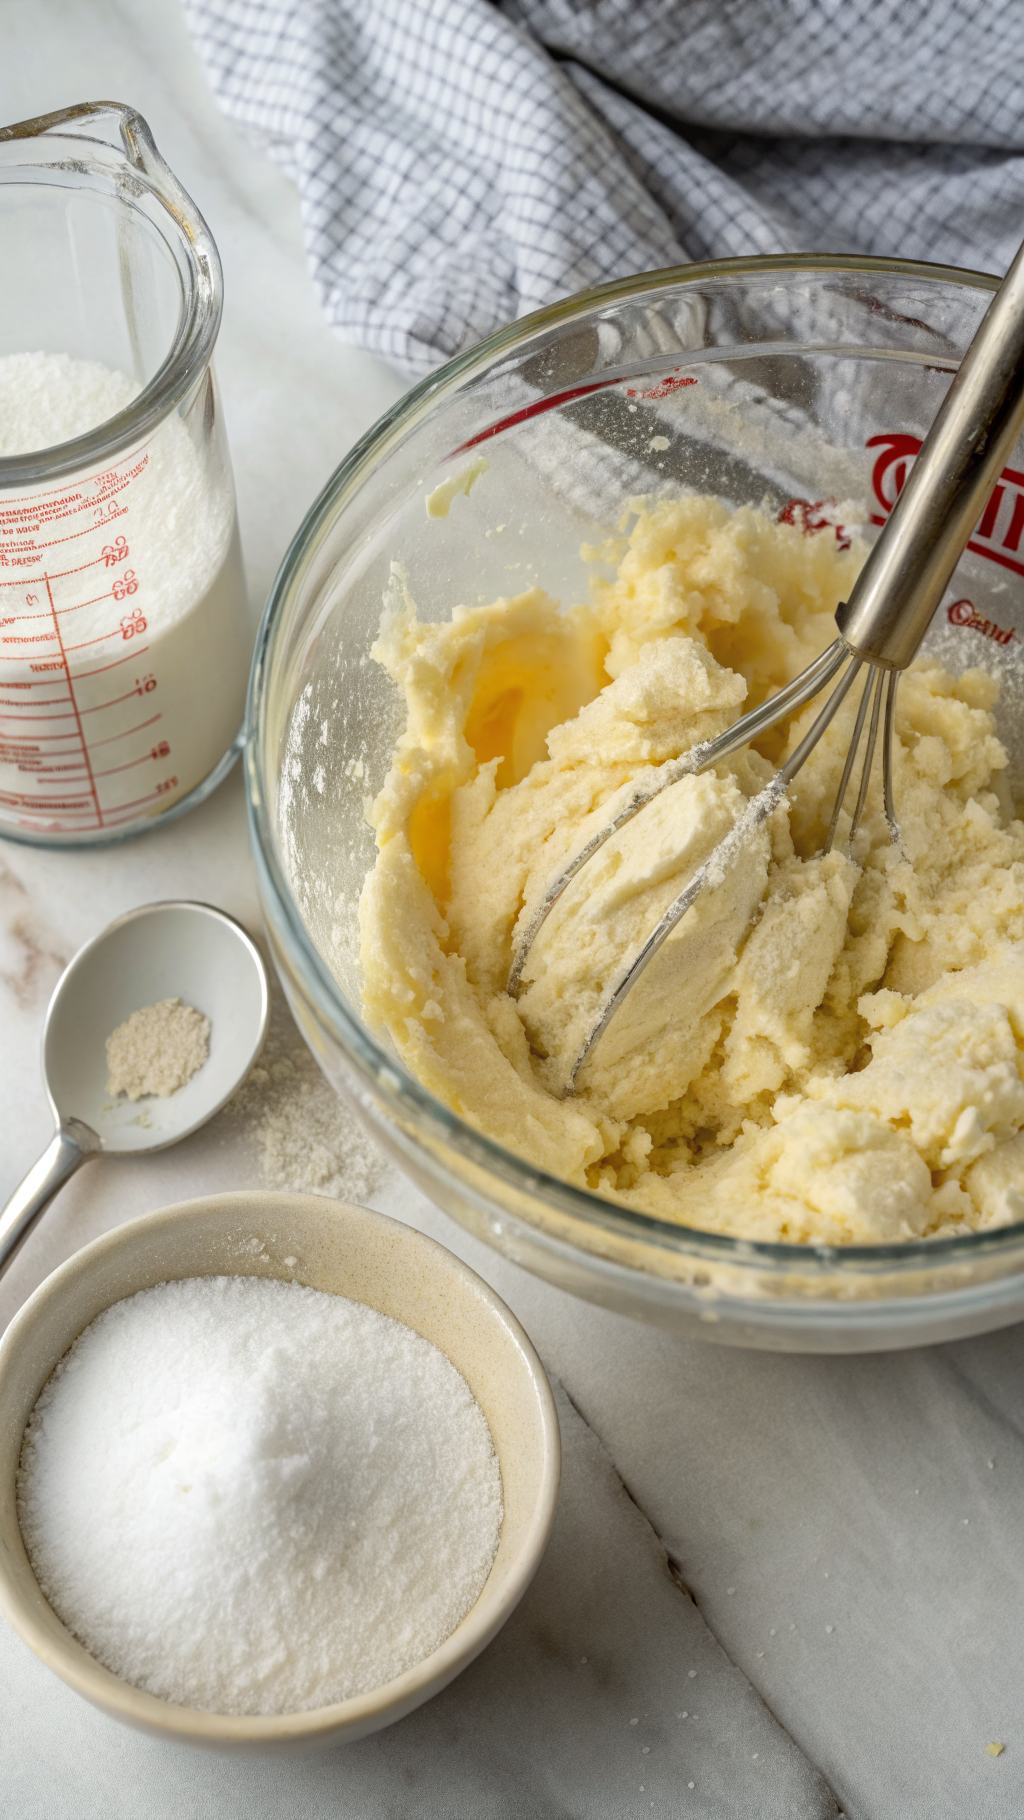
2: Mix the shortbread crust
In a large bowl, beat the softened butter and granulated sugar together until the mixture looks light and creamy. Add the flour and salt, then mix until the dough looks crumbly but holds together when you pinch it. If it feels too dry, work it with your hands a few times so it comes together.
3: Press and bake the crust
Tip the crust mixture into the prepared pan and press it into an even layer with your fingers or the bottom of a measuring cup. Make sure you press into the corners and keep the thickness as even as possible. Bake the crust for 18 to 20 minutes, until the edges look lightly golden and the top feels set.
4: Mix the lemon filling
While the crust bakes, whisk the eggs in a medium bowl until they look well combined. Add the sugar and whisk until the mixture looks smooth and slightly thick. Add the flour and salt, whisk again until no dry spots remain, then whisk in the lemon juice and zest until everything looks fully blended.
If you want an extra smooth filling, pour the mixture through a fine mesh sieve into a clean bowl. This step catches any bits of egg or zest that feel too chunky. I usually keep the zest in because I like the tiny specks of lemon.
5: Add filling and bake again
Pull the crust from the oven when it finishes baking, but keep the oven on. Give the lemon filling a quick stir, then pour it evenly over the warm crust. Tilt the pan gently so the filling reaches all corners.
Return the pan to the oven and bake for 18 to 22 minutes. The bars finish baking when the center looks set and only gives a slight jiggle if you nudge the pan. If the top browns too quickly, you can tent loosely with foil near the end, but usually it stays pale yellow.
6: Cool and chill
Place the pan on a cooling rack and let the lemon bars cool to room temperature. Then move the pan to the fridge and chill for at least 2 hours so the filling firms up. I often chill them overnight if I plan to serve them the next day.
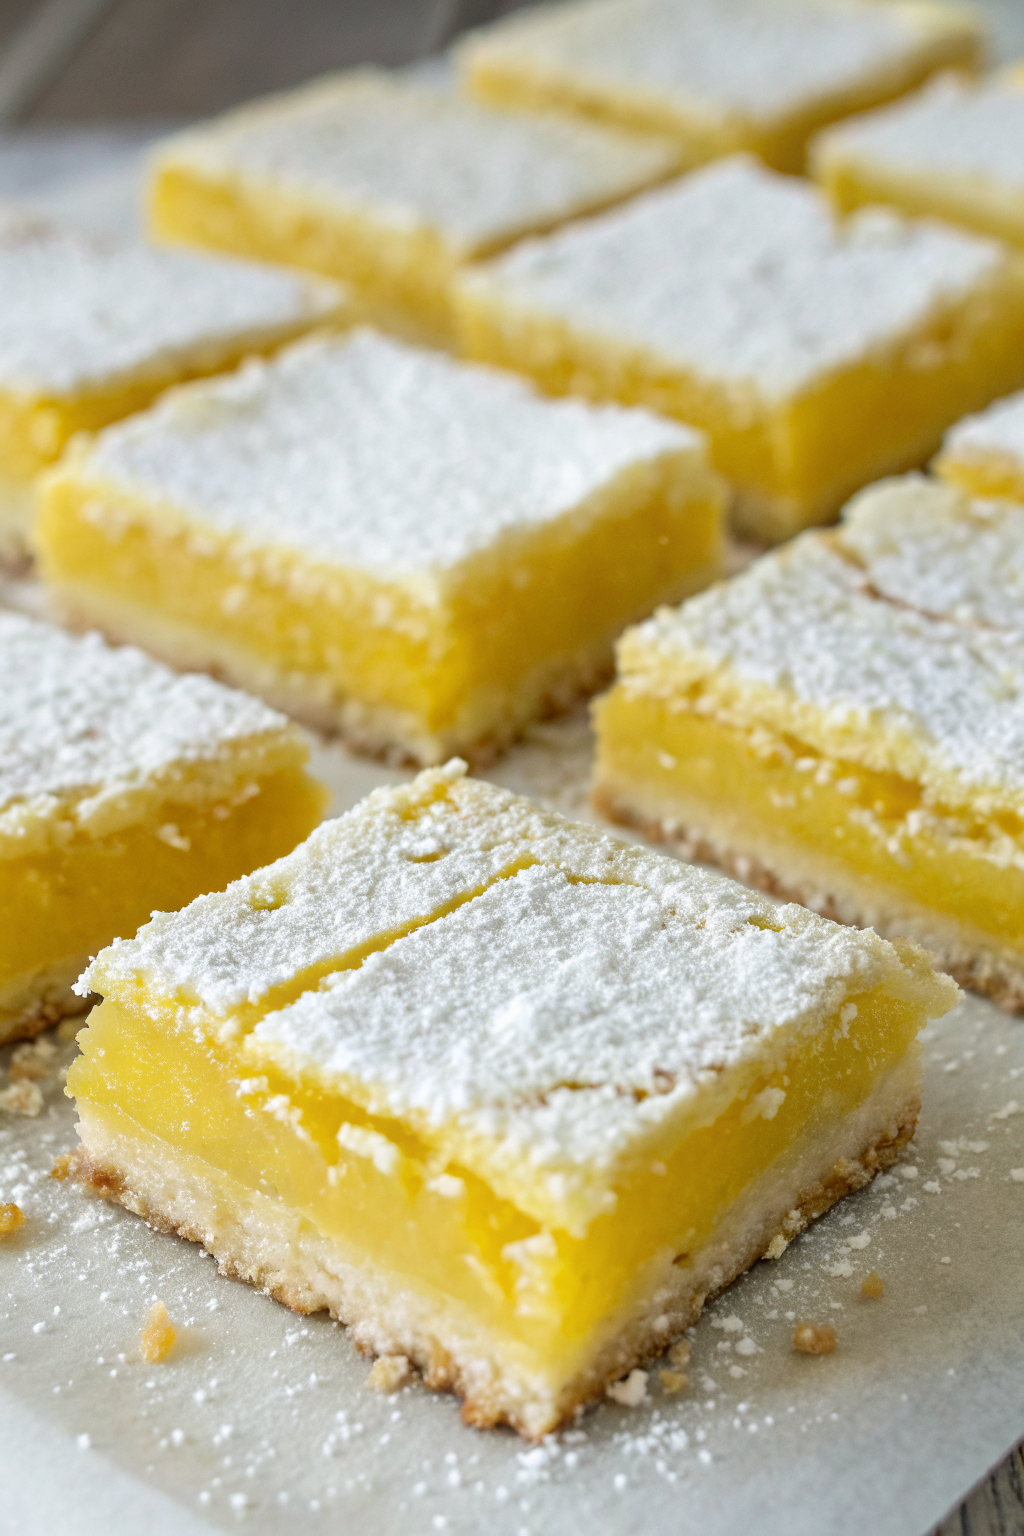
7: Cut and serve
Lift the chilled slab out of the pan using the parchment overhang. Place it on a cutting board and dust the top generously with powdered sugar. Use a sharp knife to cut into squares or rectangles, wiping the blade clean between cuts for neat edges.
Variations I’ve Tried
I sometimes swirl a few tablespoons of raspberry jam into the lemon filling before baking for a raspberry lemon bar version. You can also add 1 teaspoon of vanilla extract to the filling for a softer, bakery-style flavor. If you like coconut, sprinkle 1/2 cup of shredded coconut over the crust before you pour in the filling.
For a thicker, extra rich bar, use a slightly smaller pan, like 9 x 9, and increase the bake time a few minutes until the center sets. You can also add a pinch of ground ginger to the crust for a warm, subtle spice that pairs nicely with the bright lemon.
How to Serve Classic Lemon Bars
Serve these classic lemon bars chilled or at cool room temperature for the cleanest slices and best texture. I like to dust them with powdered sugar right before serving and add a tiny triangle of lemon slice or a few fresh berries on top. Pair them with hot coffee, iced tea, lemonade, or a simple glass of cold milk. They work as a dessert, a brunch treat, or that little afternoon pick-me-up when you need something sweet and bright.
How to store
- Store leftover lemon bars in an airtight container in the fridge for up to 4 to 5 days; keep parchment between layers so they do not stick.
- For longer storage, freeze cut bars on a baking sheet until firm, then move them to a freezer bag or container for up to 2 months.
- Thaw frozen bars in the fridge overnight or on the counter for 30 to 45 minutes before serving.
- If you like them slightly warm, let them sit at room temperature for 20 minutes; avoid the microwave, which can make the filling rubbery and the crust soggy.
Classic Lemon Bars Recipe
Ingredients
Instructions
- Preheat the oven to 350°F (175°C). Lightly grease a 9x13-inch baking pan or line it with parchment paper.
- Add 2 cups flour and the salt, mixing until a soft, crumbly dough forms.
- Press the dough evenly into the bottom of the prepared pan to form the crust.
- Bake the crust for 15–18 minutes, or until lightly golden around the edges. Leave the oven on.
- While the crust bakes, whisk the eggs in a medium bowl until well combined.
- Add 1 1/2 cups granulated sugar and whisk until smooth.
- Whisk in 1/4 cup flour until no lumps remain.
- Stir in the lemon juice and lemon zest (if using) until fully combined.
- Pour the lemon filling over the hot, partially baked crust.
- Return the pan to the oven and bake for 18–22 minutes, or until the center is set and no longer jiggly.
- Remove from the oven and let cool completely in the pan on a wire rack.
- Once cool, dust generously with powdered sugar.
- Cut into 16 squares or bars and serve. Store leftovers covered in the refrigerator.
Notes
Approximate per 1 bar (1 of 16): 220 calories; fat 10 g; saturated fat 6 g; carbohydrates 31 g; fiber 0 g; sugars 21 g; protein 3 g; sodium 80 mg. Values will vary based on specific ingredients, brands, and portion size.