Cherry scones have a special place in my heart. I remember the first time I tasted a freshly baked cherry scone at a quaint little café. The warm, buttery pastry filled with sweet cherries made my taste buds dance. Since then, I have been on a mission to perfect my own cherry scones recipe. Today, I am excited to share my favorite version with you. Trust me, once you try these scones, they will become a staple in your baking repertoire!
What Makes Cherry Scones So Special?
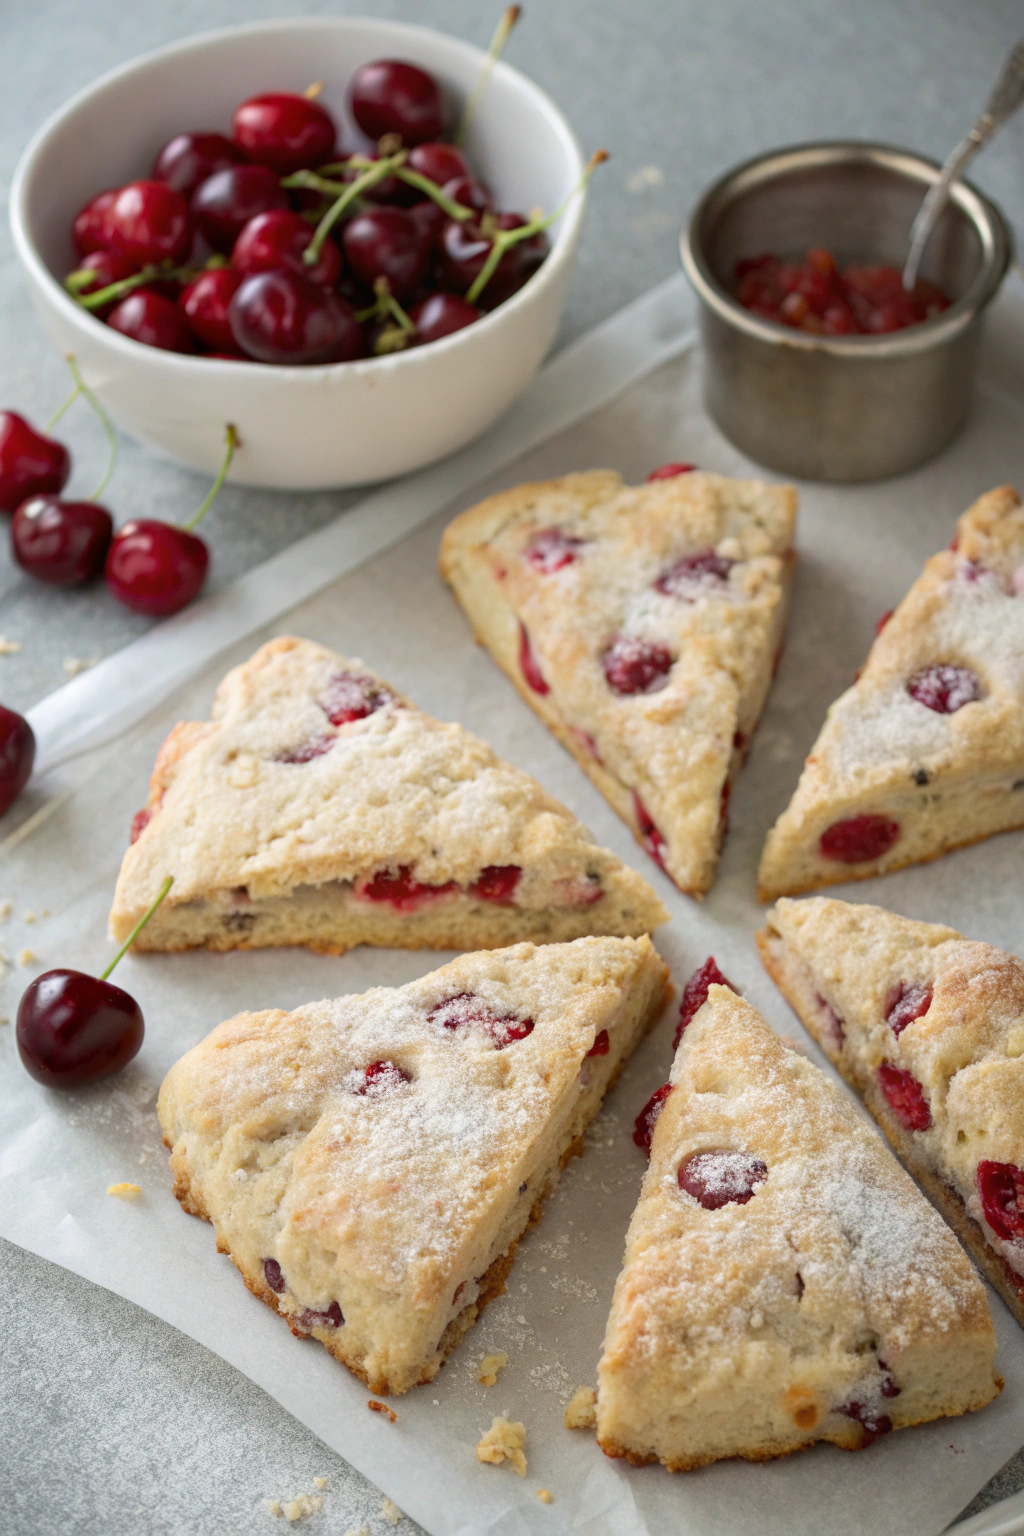
Cherry scones are not just any baked good. They are fluffy, tender, and bursting with flavor. The combination of sweet cherries and rich cream creates a delightful treat that is perfect for breakfast, brunch, or even a snack. The beauty of cherry scones lies in their simplicity. With just a few ingredients, you can create a delicious pastry that will impress everyone.
Ingredients for Cherry Scones Recipe
To make cherry scones, you will need the following ingredients:
- 2 cups all-purpose flour
- 1/4 cup granulated sugar
- 1 tablespoon baking powder
- 1/2 teaspoon salt
- 1/2 cup unsalted butter, cold and cubed
- 1 cup fresh or frozen cherries, pitted and chopped
- 3/4 cup heavy cream
- 1 teaspoon vanilla extract
- Optional: extra sugar for sprinkling on top
How to Make Cherry Scones
Making cherry scones is easier than you might think. Here is a step-by-step guide to help you through the process.
Step 1: Preheat Your Oven
Start by preheating your oven to 400°F (200°C). This step is important to ensure your scones bake evenly and rise beautifully.
Step 2: Prepare the Baking Sheet
Line a baking sheet with parchment paper. This will prevent the scones from sticking and make cleanup a breeze.
Step 3: Mix Dry Ingredients
In a large mixing bowl, combine the flour, sugar, baking powder, and salt. Whisk these ingredients together until well blended. This mixture forms the base of your scone dough.
Step 4: Cut in the Butter
Add the cold, cubed butter to the dry ingredients. Using a pastry cutter or your fingers, work the butter into the flour mixture until it resembles coarse crumbs. This step is crucial for achieving that flaky texture we all love in scones.
Step 5: Add Cherries
Gently fold in the chopped cherries. If you are using frozen cherries, make sure to thaw and drain them first to avoid excess moisture in the dough.
Step 6: Combine Wet Ingredients
In a separate bowl, mix the heavy cream and vanilla extract. Pour this mixture into the dry ingredients and stir until just combined. Be careful not to overmix, as this can lead to tough scones.
Step 7: Shape the Dough
Turn the dough out onto a lightly floured surface. Gently knead it a few times until it comes together. Pat the dough into a circle about 1 inch thick.
Step 8: Cut the Scones
Using a sharp knife or a pizza cutter, cut the dough into wedges. You can make as many scones as you like, but I usually go for eight pieces. Place the scones on the prepared baking sheet, leaving some space between them.
Step 9: Bake the Scones
Bake the scones in the preheated oven for 15 to 20 minutes, or until they are golden brown. The aroma of baking scones will fill your kitchen, and you will be tempted to sneak a taste!
Step 10: Cool and Serve
Once baked, remove the scones from the oven and let them cool on a wire rack. Serve them warm, with a pat of butter or a dollop of clotted cream for an extra treat.
Tips for Cherry scones Recipe
Baking cherry scones can be a breeze if you keep a few tips in mind. Here are some of my favorites:
- Use cold ingredients: Cold butter and cream help create a flaky texture. Don’t skip this step!
- Don’t overmix: Mix until just combined to keep the scones tender.
- Experiment with flavors: Try adding lemon zest or almond extract for a twist on the classic cherry flavor.
- Serve fresh: Scones are best enjoyed the day they are made. If you have leftovers, store them in an airtight container for up to two days.
Variations on Cherry scones Recipe
While cherry scones are delicious on their own, you can easily customize them to suit your taste. Here are some fun variations to consider:
- Cherry Almond Scones: Add sliced almonds to the dough for a nutty flavor.
- Chocolate Cherry Scones: Mix in chocolate chips for a decadent treat.
- Cherry Lemon Scones: Add lemon zest to brighten the flavor profile.
- Glazed Cherry Scones: Drizzle a simple icing made from powdered sugar and milk over the cooled scones for added sweetness.
Serving Suggestions for Cherry Scones
Cherry scones are versatile and can be enjoyed in many ways. Here are some serving suggestions to enhance your experience:
- Pair with tea or coffee: A warm scone and a hot beverage make for a cozy treat.
- Top with jam: Spread some cherry or raspberry jam on top for an extra burst of flavor.
- Serve with whipped cream: A dollop of whipped cream takes these scones to the next level.
Storing and Freezing Cherry Scones
If you find yourself with leftover cherry scones, don’t worry! Here’s how to store and freeze them:
- Storing: Keep scones in an airtight container at room temperature for up to two days.
- Freezing: To freeze, wrap each scone in plastic wrap and place them in a freezer-safe bag. They will keep well for up to three months. To enjoy, simply thaw and reheat in the oven.
Nutritional Information
If you’re curious about the nutritional content of cherry scones, here’s a rough estimate per scone (based on eight servings):
- Calories: Approximately 250
- Total Fat: 12g
- Saturated Fat: 7g
- Carbohydrates: 33g
- Sugars: 8g
- Protein: 3g
Why You’ll Love Cherry scones Recipe
Cherry scones are a delightful treat that can brighten any day. They are easy to make, delicious, and perfect for sharing with friends and family. Whether you are enjoying them for breakfast or as an afternoon snack, these scones are sure to impress.