How to Make Sourdough Starter tastes tangy, complex, and a little bit wild in the best way, with a flavor that store-bought yeast never matches. It works perfectly for home bakers who want chewy, flavorful bread and have about 5 to 7 days to build a living, bubbly starter. I still remember my first starter on a tiny apartment counter in Brooklyn, and I felt like I adopted a very needy flour pet that paid me back in incredible loaves.
Why You Should Try This Sourdough Starter Recipe
A homemade sourdough starter gives bread a deep, slightly tangy flavor and a chewy, open crumb that commercial yeast struggles to copy. You control the flavor, hydration, and strength, so your bread, pancakes, waffles, and pizza crust all taste next-level.
You also save money and skip packets of yeast, because a healthy starter keeps going for years with simple flour and water. The process teaches patience and timing, which helps every other baking project you tackle.
“This Sourdough Starter guide finally gave my loaves real flavor and big bubbles, and I felt like a legit baker. ★★★★★”
Ingredients You’ll Need
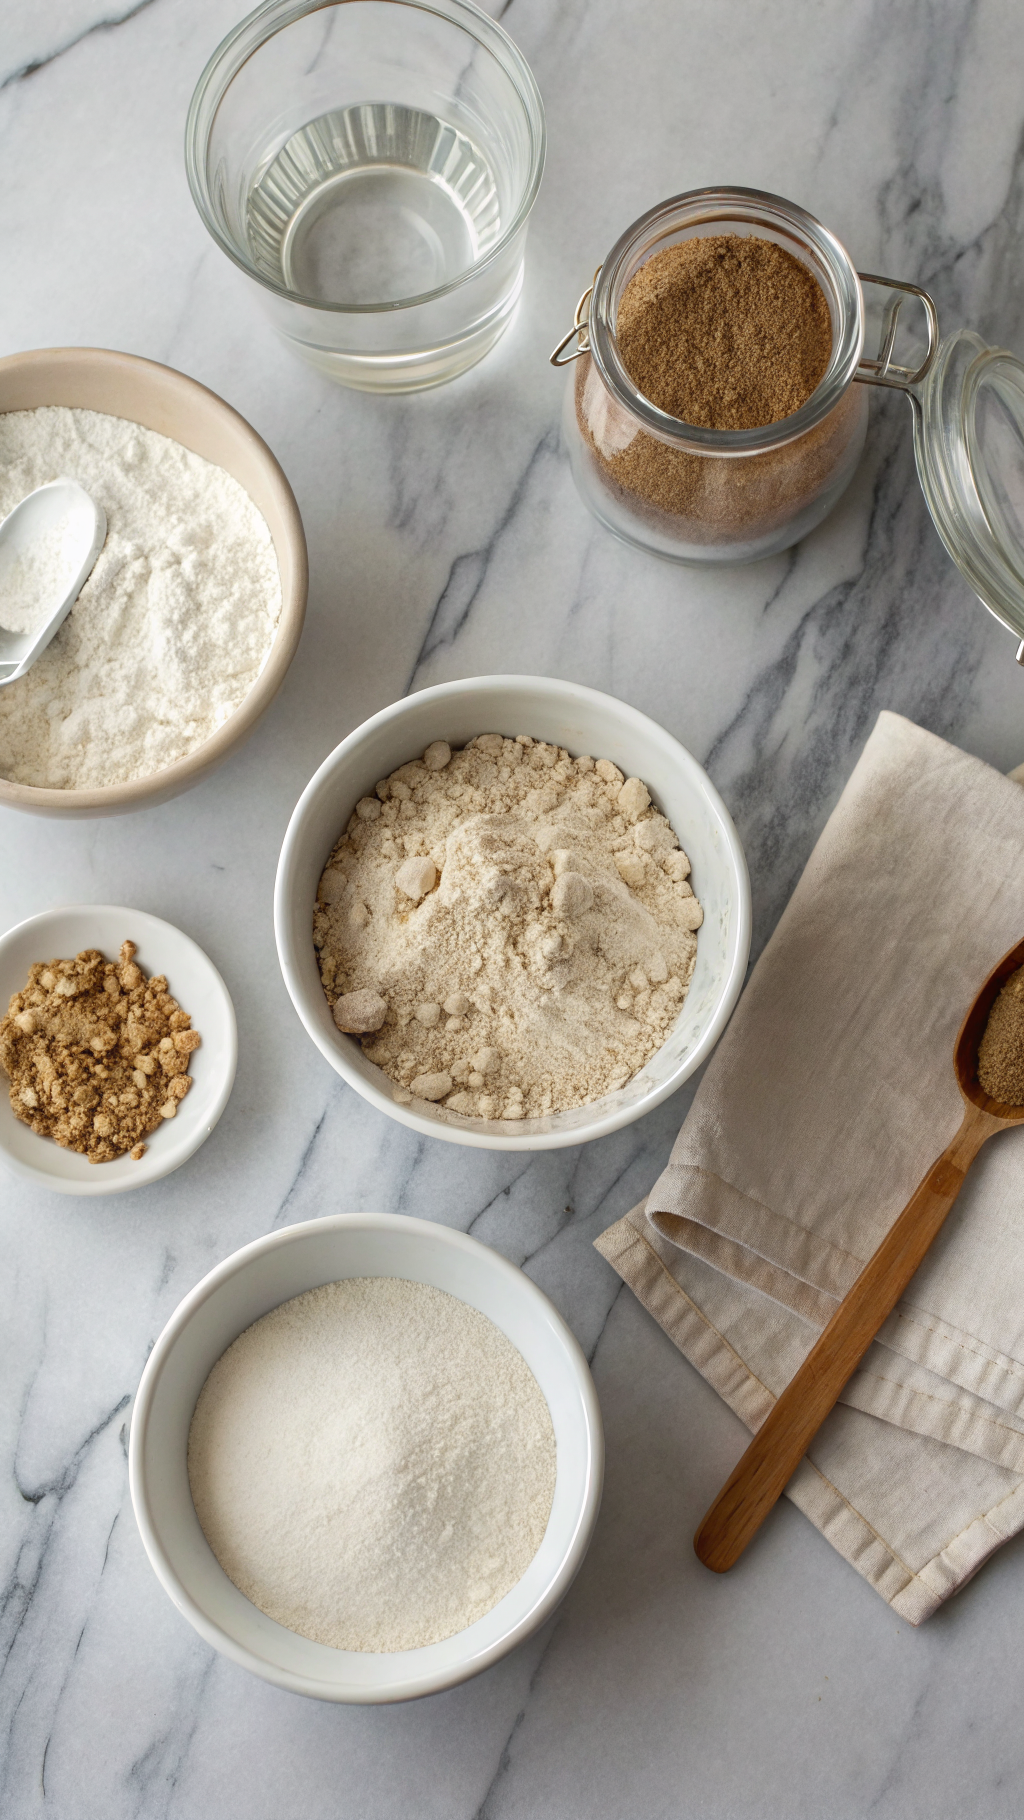
- Flour
- 2 cups (about 240 g) unbleached all-purpose flour
- 2 cups (about 240 g) whole wheat or rye flour
- Use unbleached flour, because bleaching can weaken the natural yeast and bacteria.
- Whole wheat or rye feeds the starter faster and helps it bubble sooner.
- Water
- About 2 cups (480 ml) room temperature water, 70–78°F
- Use filtered or dechlorinated water if your tap water smells strongly of chlorine.
- Cool water slows activity, warm water speeds it, so aim for mild bath temperature.
Pantry shortcuts & substitution notes
- Use all-purpose flour only if you prefer, but expect slower early activity.
- Use bread flour for feedings if you want a stronger, more elastic starter for high-hydration doughs.
- If you only have whole wheat flour, use it for the first 2–3 days, then switch to a mix of whole wheat and all-purpose for a milder flavor.
- If your water has heavy chlorine, fill a jar and let it sit uncovered overnight so the chlorine dissipates.
Equipment list
- 1 medium glass jar or clear plastic container (at least 3–4 cup capacity)
- 1 kitchen scale (strongly recommended) or measuring cups
- 1 spoon or small spatula for stirring
- 1 rubber band or piece of tape to mark the starter level
- 1 breathable cover: clean kitchen towel, paper towel, or coffee filter with a rubber band
- Optional: thermometer to check water and room temperature
- Optional: second jar so you can transfer the starter when the sides get messy
Tips & Tricks
- Feed the starter at the same time every day to build a predictable routine and strong activity.
- Keep the jar in a warm spot, around 70–78°F, such as near (not on) the stove or in the oven with the light on and the door cracked.
- Stir vigorously during each feeding to add oxygen and help the yeast grow.
- Use a scale if possible, and feed equal parts starter, flour, and water by weight for consistent results.
- If the starter smells harsh and like nail polish, feed it more often and keep it slightly warmer.
- Draw a line with a marker or place a rubber band at the starter level after feeding so you can see how much it rises.
- If you see a thin layer of grayish liquid on top, called hooch, stir it in or pour it off, then feed the starter.
- Keep the jar loosely covered so air can move, but bugs and dust stay out.
- Discard extra starter into pancakes, waffles, or crackers so you avoid wasting flour.
- If the starter looks sluggish, feed with a higher ratio of whole wheat or rye for a day or two.
How to Make Sourdough Starter
Day 1: Mix the first starter
- Place a clean jar on the scale and zero it out.
- Add 60 g whole wheat or rye flour and 60 g water (about 1/2 cup flour and 1/4 cup water if you use cups).
- Stir until no dry bits remain and the mixture looks like thick pancake batter.
- Scrape down the sides, level the top, mark the height with a rubber band, cover loosely, and leave it at room temperature for 24 hours.
Day 2: Check for early bubbles
- After 24 hours, check the surface and sides for small bubbles and a slightly tangy or fruity smell.
- Even if you see no bubbles, continue, because some starters wake up slowly.
- Discard about half of the mixture, leaving roughly 60 g in the jar.
- Add 60 g flour (whole wheat or a mix of whole wheat and all-purpose) and 60 g water, stir well, scrape down, mark the level, cover, and rest for another 24 hours.
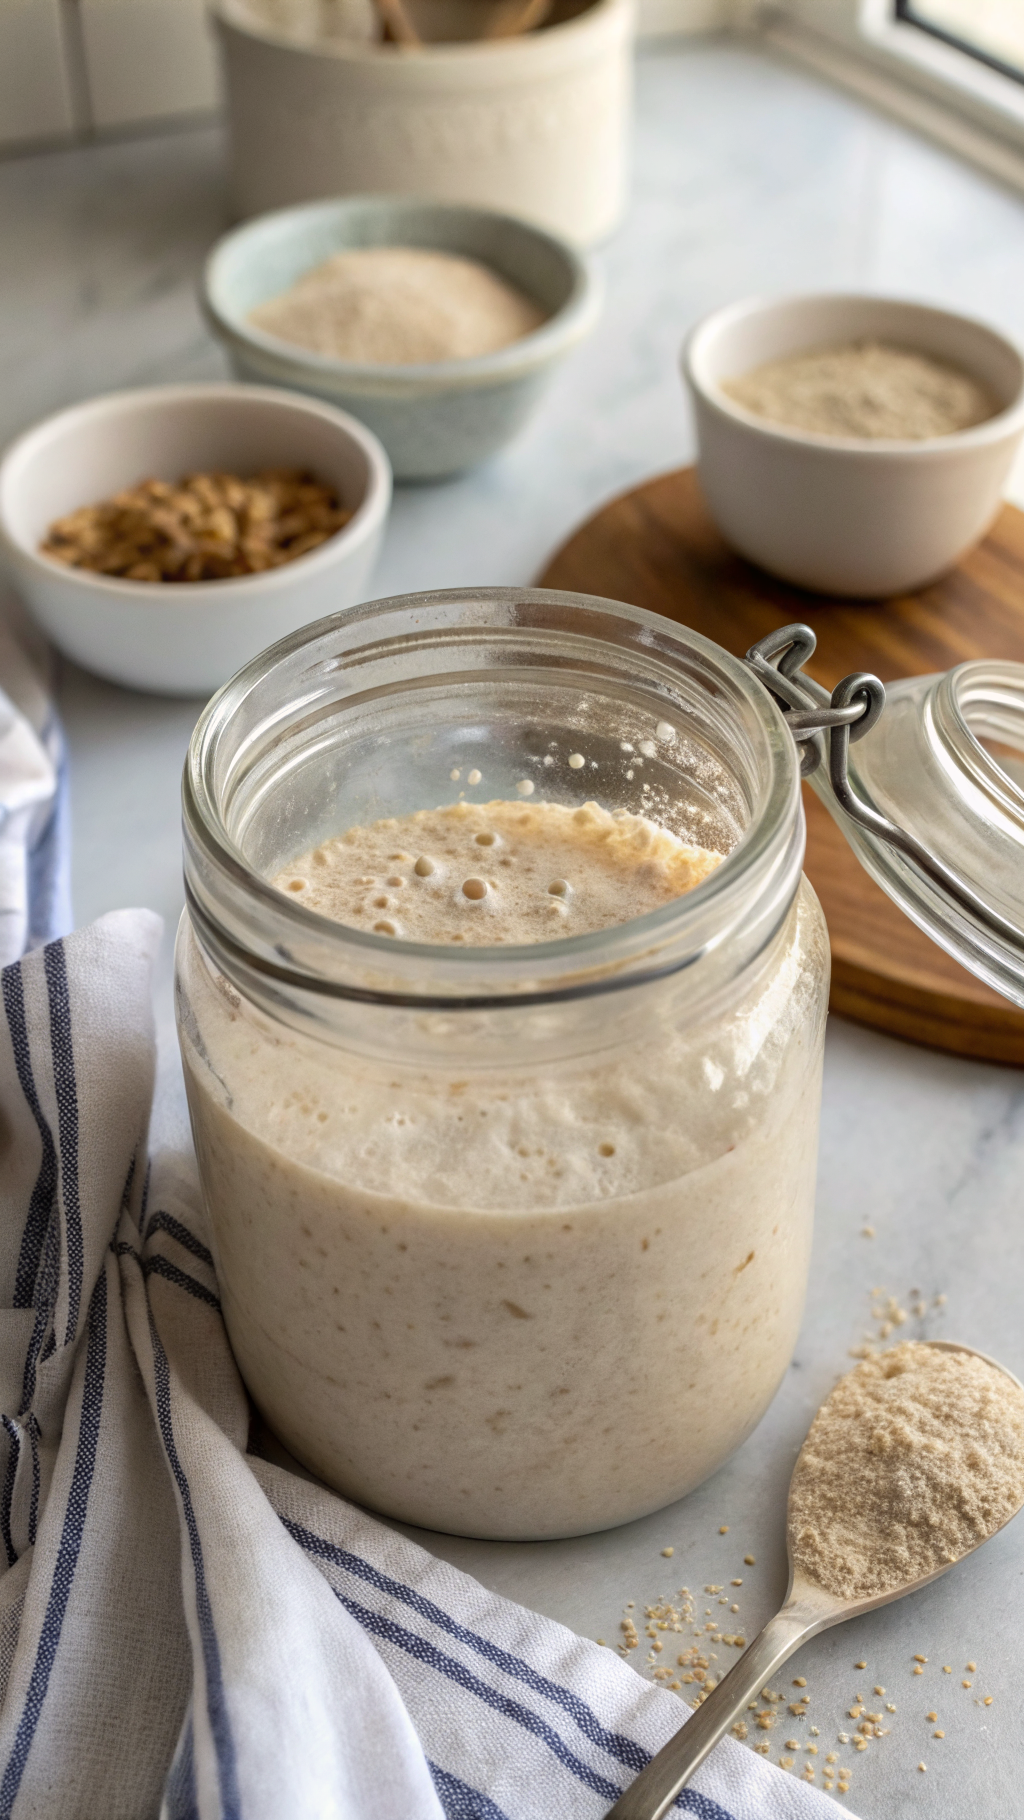
Day 3: Increase feedings if it wakes up
- By day 3, you often see more bubbles and a mild sour aroma.
- If the starter shows clear bubbles and rises slightly, start feeding twice a day, about 12 hours apart.
- Each time, discard all but 60 g starter, then feed with 60 g flour and 60 g water.
- If activity still looks weak, keep feeding once a day and use more whole wheat or rye.
Day 4: Watch the rise and fall
- The starter should rise higher and fall back down between feedings, which shows strong fermentation.
- Feed twice a day with the same ratio: 1 part starter, 1 part flour, 1 part water by weight.
- Keep the jar in a warm, stable spot and avoid moving it too often.
- If it doubles in volume in 8–12 hours, you move very close to a usable sourdough starter.
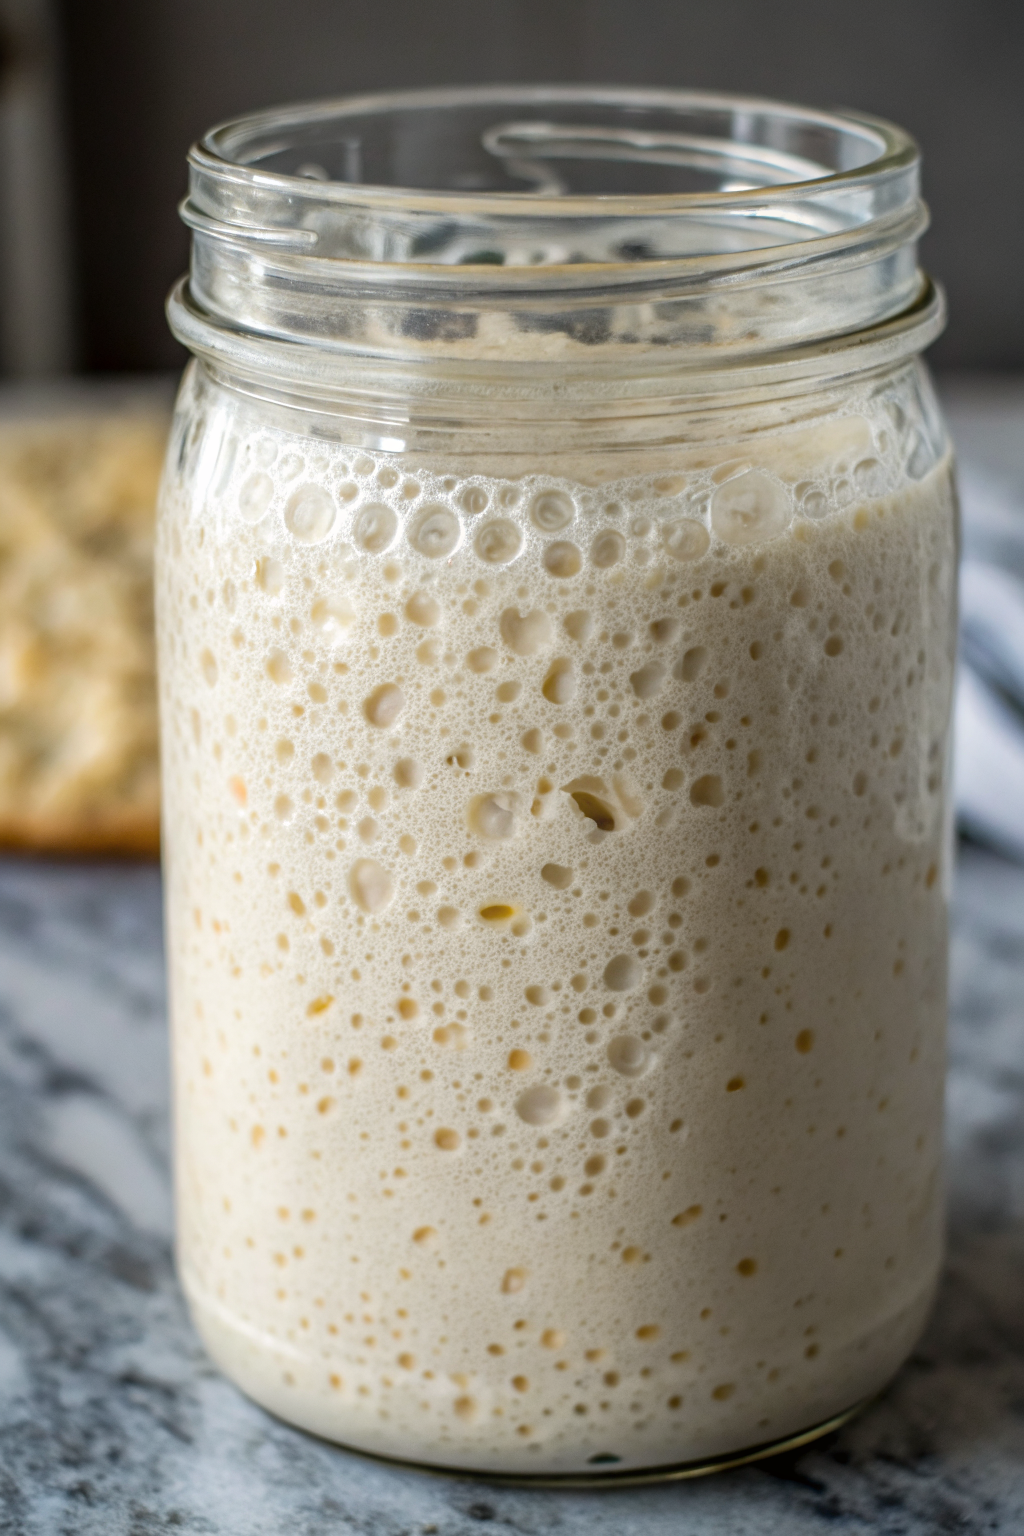
Day 5: Test for baking strength
- On day 5, feed the starter and mark the level again.
- Watch how long it takes to double in size; a strong starter usually doubles in 4–8 hours at warm room temperature.
- Use the float test: gently drop a spoonful of starter into a glass of water; if it floats, it holds enough gas for baking.
- If it sinks, keep feeding twice daily for another day or two and test again.
Day 6–7: Transition to maintenance
- Once the starter doubles reliably and passes the float test, shift to a maintenance schedule.
- If you bake daily, keep it at room temperature and feed it once or twice a day with equal parts starter, flour, and water by weight.
- If you bake once a week or less, move the starter to the fridge and feed it once a week.
- Before baking, pull it out, feed it 1–2 times at room temperature, and use it when it reaches peak height.
Optional: Adjust thickness and flavor
- If you prefer a thicker starter, feed with slightly more flour than water until it reaches a soft dough texture.
- For a looser starter, add a bit more water until it looks like thick batter.
- For a milder flavor, use more all-purpose flour; for a tangier flavor, keep some whole wheat or rye in the mix.
- Keep notes on flour type, feeding times, and rise so you dial in your perfect sourdough starter routine.
Storage Options
- Room temperature, active use: Keep the starter on the counter and feed it once or twice daily if you bake often.
- Refrigerator, weekly baking: Store the starter in the fridge with a loose lid and feed it at least once a week, then give it 1–2 room temperature feedings before baking.
- Long-term fridge rest: Leave the starter in the fridge for up to 1 month without feeding, then revive it with several room temperature feedings until it doubles again.
- Freezer storage: Freeze a thick starter in an airtight container for up to 3 months, then thaw in the fridge and refresh with multiple feedings.
- Dried backup: Spread a thin layer of starter on parchment, let it dry completely, break it into flakes, store in a jar, and rehydrate with equal parts water and flour when you want to bring it back.
How to Make Sourdough Starter
Ingredients
Instructions
- In a clean glass jar or container (at least 1-quart capacity), mix 1/2 cup whole wheat flour with 1/2 cup room-temperature water until no dry flour remains. The mixture should be the consistency of thick pancake batter.
- Scrape down the sides, cover the jar loosely with a lid, cloth, or plastic wrap (allowing a bit of airflow), and leave it at warm room temperature (70–75°F / 21–24°C) for 24 hours.
- Check the mixture. You may or may not see a few bubbles; either is fine at this stage.
- Discard about half of the starter (down to roughly 1/2 cup).
- Add 1/2 cup unbleached all-purpose flour and 1/2 cup room-temperature water to the remaining starter. Stir thoroughly, cover loosely, and let rest another 24 hours at warm room temperature.
- Once every 24 hours, discard about half of the starter, leaving roughly 1/2 cup in the jar.
- Feed with 1/2 cup unbleached all-purpose flour and 1/2 cup room-temperature water. Stir until smooth, cover loosely, and let stand at warm room temperature.
- By Day 3 or 4, you should begin to see more bubbles, a rise in volume between feedings, and a mild tangy aroma.
- Continue the same process of discarding about half and feeding with 1/2 cup flour and 1/2 cup water once every 24 hours, or increase to every 12 hours if your kitchen is cool and activity is slow.
- The starter is ready to use when it reliably doubles in volume within about 4–6 hours of feeding, has a pleasantly sour aroma, and is full of bubbles throughout.
- For daily baking, keep the starter at room temperature and feed it once or twice a day using the same discard-and-feed method.
- For occasional baking, store the starter covered in the refrigerator and feed it at least once a week. Before baking, take it out, feed it, and allow it to become active and bubbly again.
Notes
Approximate per 1-tablespoon (15 g) active starter: 20 calories; fat 0 g; saturated fat 0 g; carbohydrates 4 g; fiber 0 g; sugars 0 g; protein 1 g; sodium 0 mg. Values are estimates and will vary with flour type, hydration level, and portion size.